Adding a logo to a shirt is essential for ecommerce entrepreneurs looking to enhance their brand presence and offer customized products. Whether you’re creating merchandise for your online t-shirt business, fulfilling personalized orders, or designing clothing to wear at an event to promote your company, understanding how to professionally apply logos to shirts can set you apart in the competitive market.
This article serves as a step-by-step guide to the logo addition process to assist you in ensuring professional-looking, branded apparel that'll appeal to your customers and elevate your ecommerce business!

Photo by Liza Summer
1. Create your logo
The first step of placing a logo on any type of clothing is of course ensuring that you have a stellar logo to use. If you don't already have an ecommerce logo on hand, it's time to start working on designing one.
There are numerous ways to go about this, and the best option for you will depend on your budget, time constraints, and desired level of uniqueness and professionalism in the design.
Design your business logo yourself
If you're well versed in design or at least have a bit of artistic flair, you can design your own logo by taking advantage of the various design software and tools available today.
For example, you can use Adobe Illustrator or Photoshop if your design skills are more on the advanced side, or avail of free online design platforms like Looka and Canva, which offer user-friendly interfaces and a plethora of templates for easy logo generation.
These tools are great for entrepreneurs who want to craft a logo themselves without needing extensive design skills. They provide various customization options, allowing you to pick fonts, colors, and symbols that align with your brand's visual identity.
Hire a professional designer to create a custom logo
For a more unique and professional logo, you might consider hiring a graphic designer. This can be done through freelance platforms like Upwork or Fiverr, or by engaging a local design agency.
Professional designers can bring a high level of creativity and expertise, ensuring that your custom logo not only looks appealing but also effectively communicates your brand’s message.
Launch a logo design contest
Platforms like 99designs allow you to host a logo design contest where multiple designers submit their creations based on your brief. This method gives you a variety of designs to choose from and the flexibility to tweak the designs further.
Note that this strategy may take a little longer than others, so it may not be the ideal option if you're in a rush to get your logo made. However, it can be a great way to see different creative interpretations of your brand and to find a logo that resonates with your vision!
2. Choose an application method
Once you have your logo ready to go, you'll then need to decide how you want to apply it to shirts. Not sure which technique to use?
Let's go over some of the most popular options for adding a logo to a shirt you'll find today.
Each of these methods has its benefits depending on the type of design, the fabric of the shirt, the print quality desired, and the quantity needed.
Screen printing
This is one of the most common and economical methods for printing bulk orders. It involves creating a stencil (or screen) and using it to apply layers of ink on the printing surface. Each color is applied using a different stencil, one at a time, to achieve the final look. Screen printing is best suited for designs with a limited number of colors.
Vinyl cutting
This technique uses a machine to cut out designs on colored vinyl which is then heat pressed onto the garment. Vinyl cutting is great for creating bold and simple designs, especially in sports jerseys and custom t-shirts for small orders.
Direct-to-garment (DTG) printing
DTG printing involves the use of a specialized fabric printer, much like an inkjet printer, to print directly onto the garment. This method allows for professional prints with detailed designs and a wide range of colors. It's especially cost-effective for small batches and complex, colorful designs.
Embroidery
For a more durable and professional look, embroidery is an excellent option. It involves sewing the design into the fabric, which results in a textured and high-quality appearance. This technique is ideal for logos on professional or high-end apparel, like corporate uniforms or premium merch.
Heat transfer
In this method, a logo is printed onto special paper and then transferred onto the fabric using heat and pressure. This can be done with a heat press machine or a simple iron. Heat transfer is versatile for full-color designs and smaller batches but might result in a print that is less durable and can crack over time.
Sublimation
Sublimation is best for polyester fabrics and involves turning a solid dye into a gas without passing through a liquid state and bonding it directly with the fabric fibers. This method produces vibrant, full-color, all-over prints that are very durable and don’t feel different from the unprinted parts of the garment.
Patch application
With this technique, you'll be creating a logo on a separate piece of fabric or material, which will then be attached to the shirt as a patch. The patches can be made from various materials like embroidered fabric, leather, or PVC and are typically sewn or ironed onto the garment.
3. Select a type of shirt
Now, it's time to figure out what kind of shirt you wish to use in combination with your business logo, keeping in mind that there are several important factors to take into account with your decision.
For instance, when selecting a type of shirt for your business logo, you'll want to consider the fabric quality and type, as this affects both comfort and how well the logo application method works (e.g., cotton is ideal for screen printing, while polyester suits sublimation).
In addition, the shirt color should complement your logo to ensure it stands out effectively. While black or white shirts are classic options, they won't be very effective if your logo blends in and disappears!
Furthermore, think about the shirt style (e.g., t-shirts, polos, or dress shirts) and how it aligns with your brand image. Durability is key, especially if the shirts are for regular use by employees. Finally, also consider your budget and the cost per shirt, balancing quality and affordability to maximize value.
4. Decide where to place your logo
When you want to add your logo to products, finding the right placement is crucial. Though the placement of a logo on a shirt may seem like a trivial detail at first glance, it can significantly affect your brand's visibility and perception.

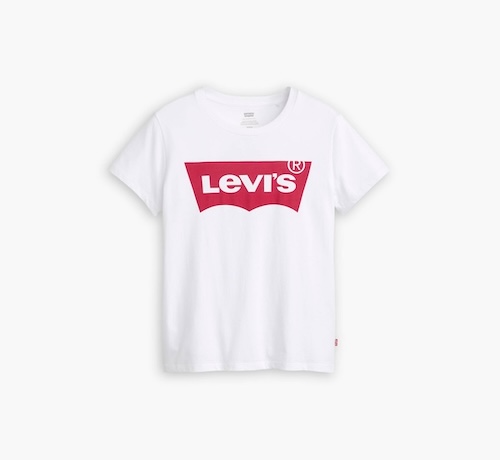
Source: Levi's
To help you decide where to put your logo, here are some common logo placements for shirts:
- Left or right chest: This is the most traditional spot for a logo. It's subtly prominent, suitable for professional settings, and doesn't interfere with the shirt's design. However, it's a relatively small area, limiting the detail visible in the logo.
- Full front: Larger logos across the entire front of the shirt are common for promotional or casual wear. This placement is highly visible and offers ample space for detailed or larger designs, but it can be seen as too bold or casual for professional environments.
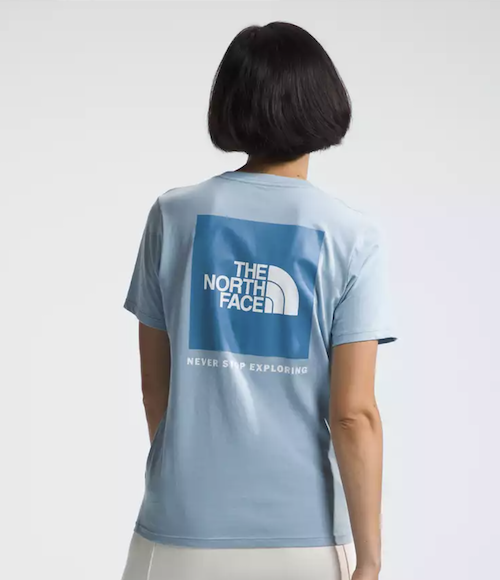
- Upper back (below the collar): A secondary spot that's often used for additional branding elements, it allows logos to be visible when the front of the shirt is covered by a jacket or another layer. Obviously this means that there will be limited exposure in this location compared to the front, though.
- Sleeve: You can also opt to put logos either on the upper part near the shoulder or along the forearm of the shirt. This is good for a subtle addition or secondary branding, and it can complement a chest or back logo. That being said, a sleeve's smaller space limits the size and detail you can use for logos.
- Nape of the neck: This site places logos inside or outside the shirt, right below the collar on the back. It's a discrete placement ideal for a minimalist design approach, but as it's not very visible, it's more suited for subtle branding.
- Lower hem: Small logos can be placed at the bottom edge of the shirt. Subtle and stylish, it adds a refined touch to casual wear. Keep in mind, however, it's the least visible placement and often goes unnoticed.
5. Pick a logo size
Next up, you'll have to determine how big you want the logo you'll be adding to shirts to be.
When deciding on the size of your logo, it's crucial to consider the logo's visibility and the statement you want it to make. While a larger logo is more noticeable and can be ideal for promotional purposes, a smaller logo might be more suitable for professional or subtle branding.

Source: The North Face
Another key element to consider? Logo placement. For instance, a chest logo can be smaller than one centered on the back.
You'll also want to ensure that the logo's details are clear and not distorted by the shirt's fabric or seams. Remember that balancing the logo's scale with the shirt's design can help maintain aesthetic appeal without overwhelming the garment's overall look.
6. Add the logo to shirts
At this point, you're ready to finally add your logo to your shirts! Depending on your chosen application method and how many shirts you plan to add logos to, you can either opt to go the DIY route or place an order with a professional service.
If you'll be availing of DIY options, be sure to carefully follow any provided instructions (if applicable). Before proceeding with a large batch, consider producing a sample shirt and evaluate how the logo appears when worn. That way, if necessary, you can make adjustments to ensure that the desired visual effect is achieved.
Want to hand this step over to the professionals instead? When outsourcing, be sure to go with a reputable provider to ensure durability and color accuracy. Here again, though, remember to test on a sample fabric to check the result before finalizing your design.
7. Check for quality
Checking the quality of your logo on shirts is crucial to ensure that your brand is represented accurately and professionally.
Examine each shirt for clarity, color accuracy, and placement consistency of the logo. In addition, look for any signs of peeling, fading, or misalignment, particularly with methods like screen printing or heat transfer. Don't forget to also verify that the logo doesn't have any unintended distortions or irregularities in the fabric.
If you find any issues, address them with your supplier or adjust your technique if you're applying logos yourself. Consistent quality checks prevent costly mistakes and help maintain your brand's reputation for high standards.
Putting a logo on a shirt FAQ
How do you put a logo on a shirt?
After you have a great business logo to add to a shirt, you'll start by choosing how you wish to apply the logo to the article of clothing and select what type of shirt you want to use with your logo.
Then, determine where you'll be placing the logo on the shirt and figure out the ideal logo size for your needs. Finally, add the logo to the shirt either yourself or by hiring a professional service, and verify that the final result matches your vision and is something you're proud to present to the world.
Where should you place a logo on a shirt?
The best place for your logo is going to depend on who the shirt is for and what you wish to accomplish by placing your logo on the shirt.
One of the most popular places to put a logo on a shirt is typically on the left chest area, as it is highly visible and professional-looking. This placement works well for branding and identification purposes, making it ideal for company uniforms and promotional shirts.
Alternatively, logos can also be centered on the back or front of the shirt for a more prominent display, which is effective for larger designs and marketing messages.
Can you put logos on clothing from home?
Yes, you can put logos on different types of clothing, including shirts, from the comfort of home, provided that you have the necessary tools and equipment for your chosen technique for adding logos to products.
However, just because you can do it from home, doesn't mean that it's going to be the most efficient or even cost-effective strategy. It's important to think about your budget, time, and other resources you have available before determining what is going to work best for your company.


