Key points in this article:
- WiziShop offers a simple step-by-step process to build and launch an ecommerce website quickly.
- It starts with creating an account on the ecommerce platform, which auto-configures most of your store’s setup and tools.
- You’ll customize your website’s design and homepage layout using built-in tools like responsive design templates and “WiziBlocks.”
- Building your ecommerce site also involves setting up delivery options and adding your first products, including writing good product descriptions and uploading high-quality photos.
- In addition, you’ll ned to configure payment methods and complete final checks before launching your ecommerce store live.
Congratulations! You’re on the cusp of becoming a successful digital entrepreneur!
You’ve decided to become your own boss and to enjoy total freedom! The problem is that you aren’t even sure where to begin when it comes to selling online…
Rest assured, I’m going to show you step by step.
I’m going to guide you through all the elements of creating your store online from scratch that will help you generate your first sales in the blink of an eye.
All you need to do is follow these six steps and use your own images, products, and text.
Throughout this article, you’ll discover how to build an online store along with all the secrets that online retailers wish they had known before launching.
Whatever your ecommerce experience may be, with this guide, you’ll be able to set your store up in a short amount of time with our ecommerce website builder.
The objective is to quickly get a first version of your store online. Follow the steps one by one. Keep it simple. Above all, don’t try and perfect your website immediately or try to do too much.
Aim to launch your online store as early as possible so you can start sending good signals to Google. This will also give you the opportunity to get your first sales. Every second counts in the life of an entrepreneur.
Of course, launching your website is only the first step. Every day, you should then strive to improve, optimize, and eventually launch new goods to make your marketing strategy as effective as possible.
Give yourself small objectives that are attainable, one after the other.
Today, the goal is to build your store, including creating the design and displaying the first product. Not too much longer from now, you’ll be clicking on the launch button and will have officially become an ecommerce entrepreneur.
Let’s go!
1. Create your account for free
The WiziShop ecommerce solution offers a 7-day free trial.
If you haven’t already had the chance to read our articles on why WiziShop is the best ecommerce platform on the market and why you should use an ecommerce platform, here’s your opportunity.
In these articles, we explain the unique aspects of our ecommerce solution and why you have a better chance of succeeding with us.
The first step to creating an ecommerce store is, of course, creating an account. You’ll see that it’s really simple.
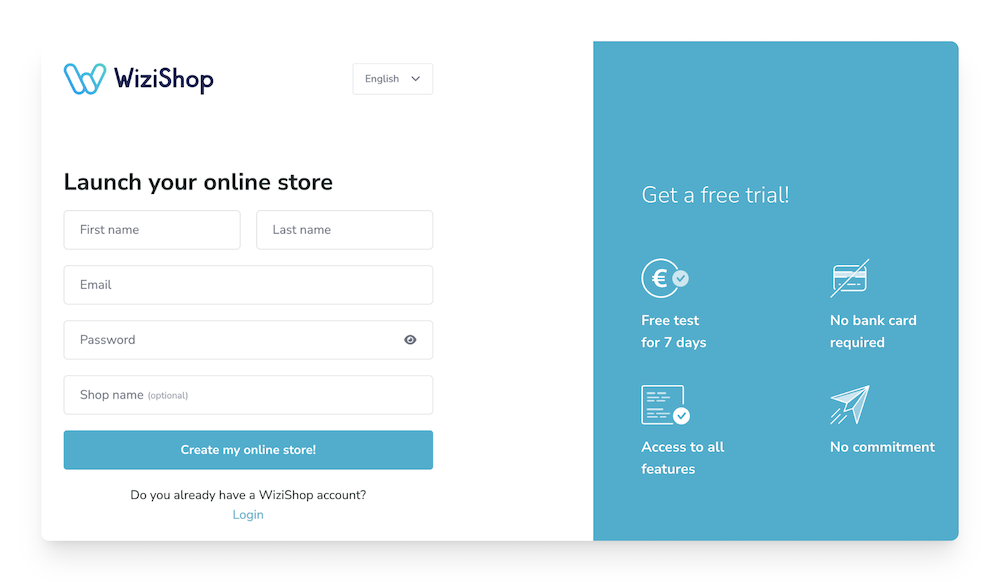
Don't worry if you haven't decided on a name for your site yet—it’s optional, and you can change it later!
Once your form has been validated, we will create your store.
In less than a minute, you’ll have a pre-configured store and a complete development tool at the tip of your fingers.
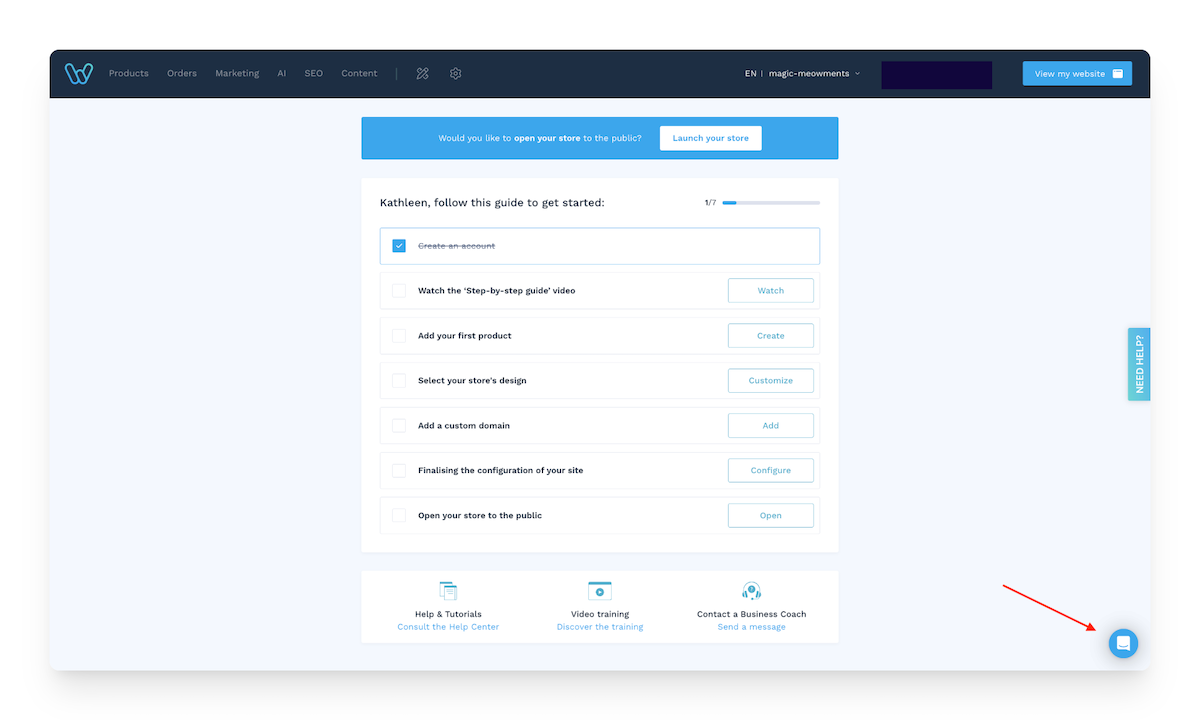
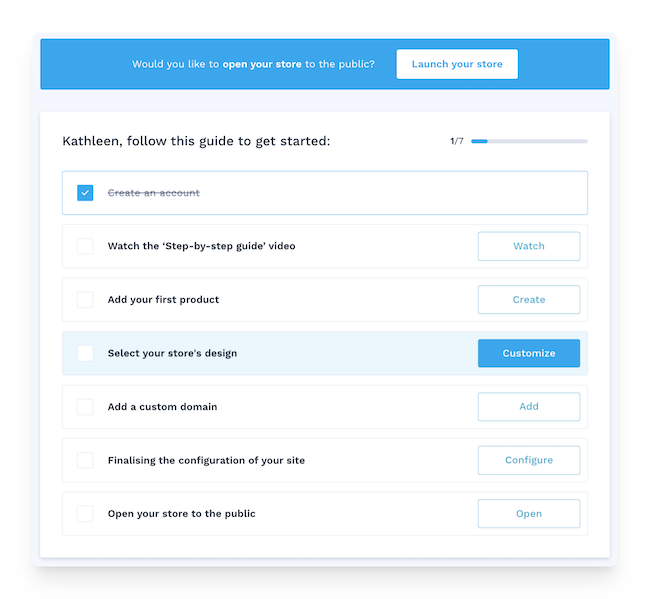
You then arrive at your administration area (also called back office or dashboard).
Let yourself be guided by our system.

This is where you’ll manage your ecommerce site and the store’s design.
At this stage, your ecommerce site is already more than 80% set up by our team!
In fact, your hosting and technical structure are already in place. Numerous marketing applications (more than 250) are already installed.
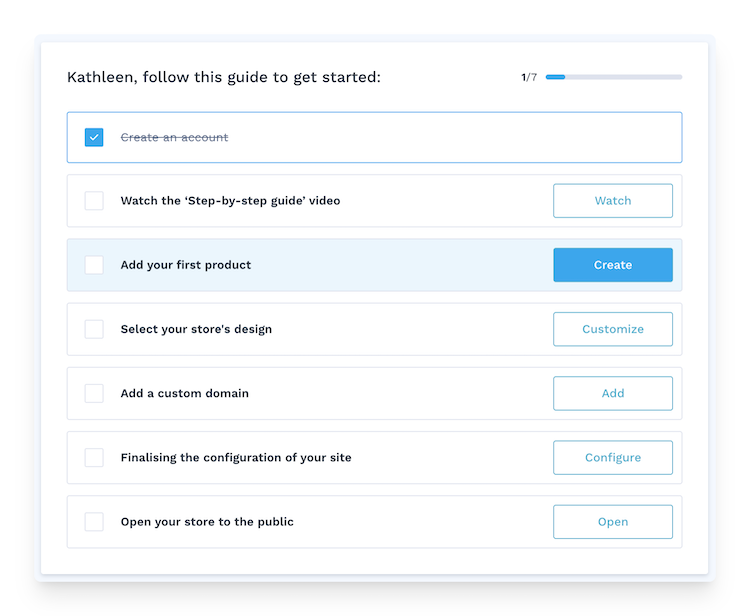
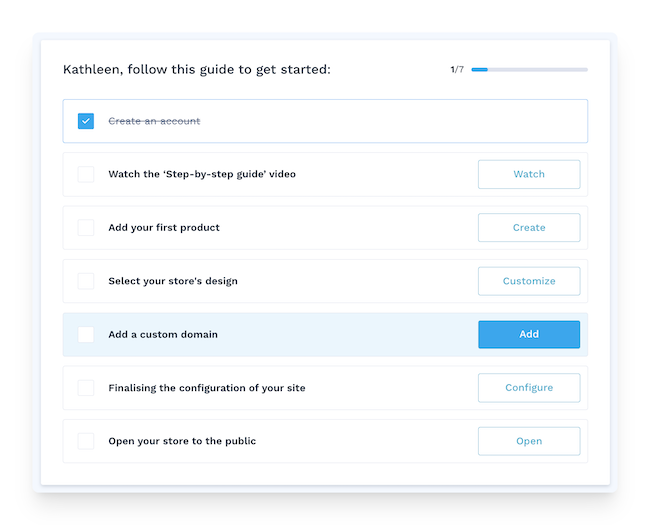
We have simply listed the different steps you need to take, and that is exactly what we are going to do together now.
You can also preview the store you’ve created by clicking on “View my website” in the top right of your dashboard.

Once you’re there, you’ll see two main choices: on the left “Customize the Design” (the place to go to change the appearance of your store) and on the right “Add my logo.”
First, we’re going to upload your logo.
Click on Add my logo > Add a logo or the store’s banner. Upload your logo by following the instructions on your screen.
To help you with the setup, you can make an appointment with our Business Coaches or ask them any questions you may have. Don’t hesitate to get in touch—they’re there to support you through every stage of your project, from technical support to your web marketing strategy! To contact them, simply click on the blue bubble at the bottom of your admin area (you must have a test account to access it).
Now’s the time to add your first product in record time!
2. Add your first product
I’m going to continue based on the idea that you already know what your store is going to offer. However, if that’s not the case, you can read this article to aid you in deciding what to sell online and how to find trending products.
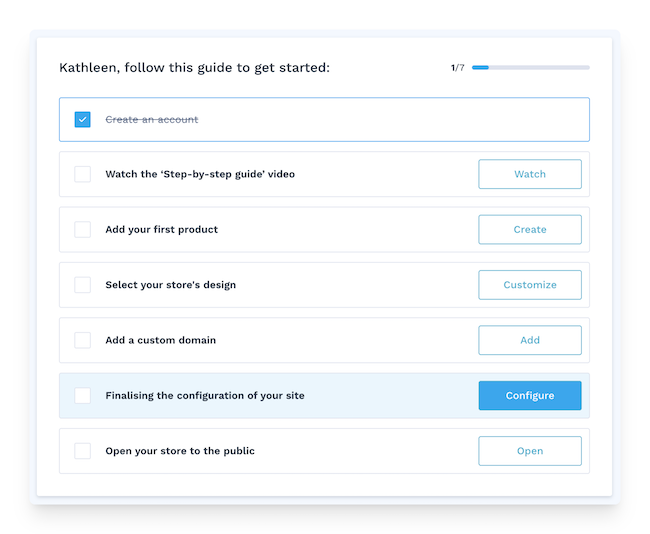
Click on the “Add your first product” step directly from the homepage of your administration area:
Then, choose between “Create the product with AI” or “Create the product without AI.”
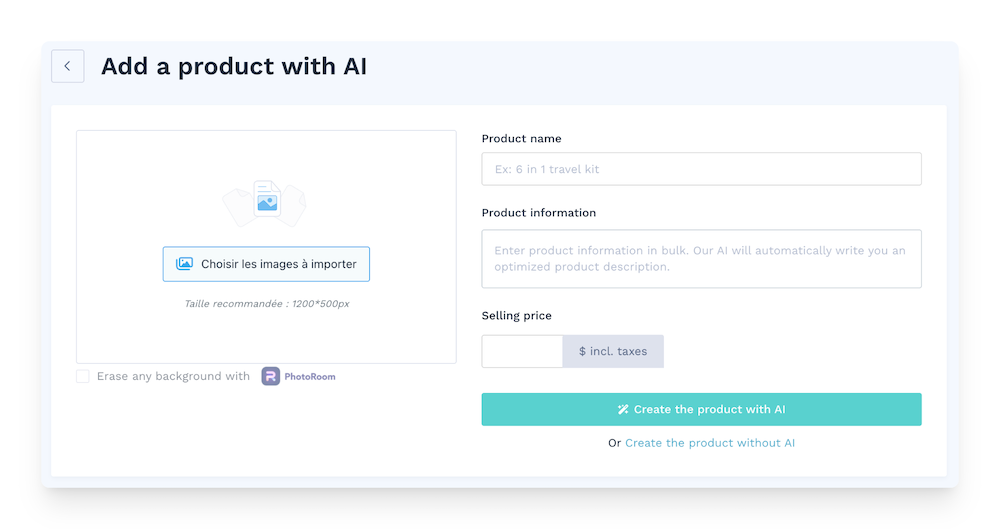
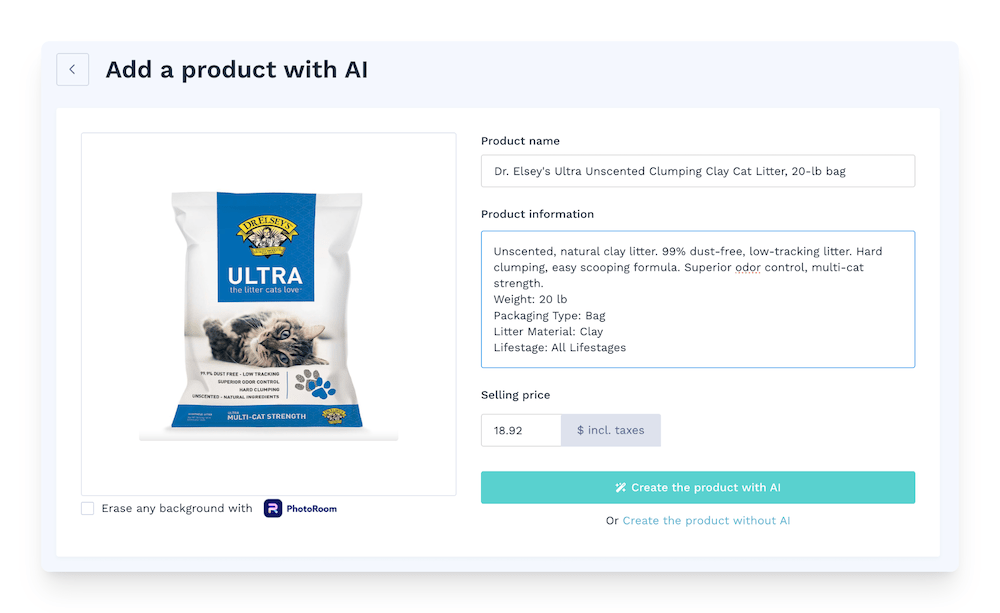
With the AI, you simply need to fill in the few requested details (image, name, characteristics, selling price):
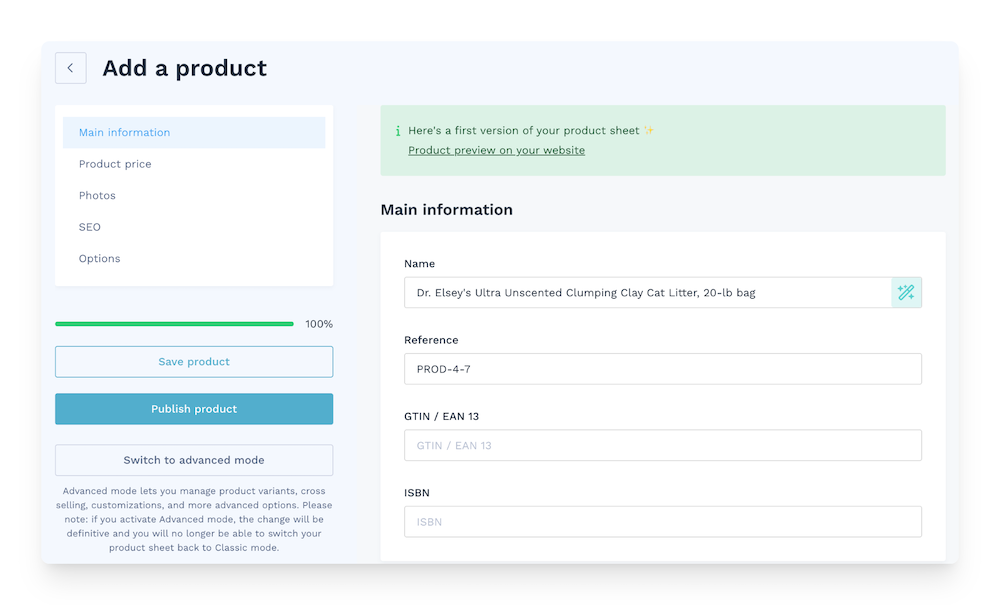
After a few seconds, you arrive at the product listing editing page, and all the information is already filled in: short description, long description, category, etc.
You can also click on the preview of your product on your website:

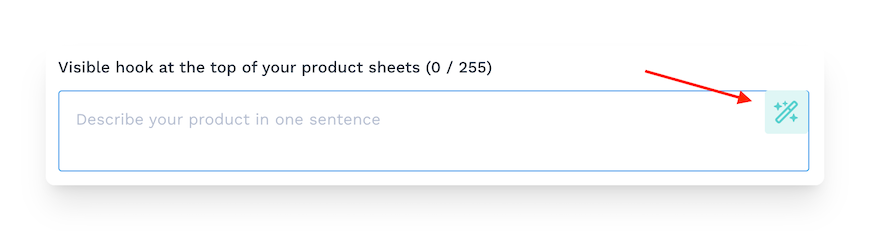
Without AI, you’ll need to fill in each piece of information yourself. However, you can still use the AI tool to generate the various pieces of information by clicking on the magic wand icon on the right.
Here are some detailed explanations of each section of the product page editing process:
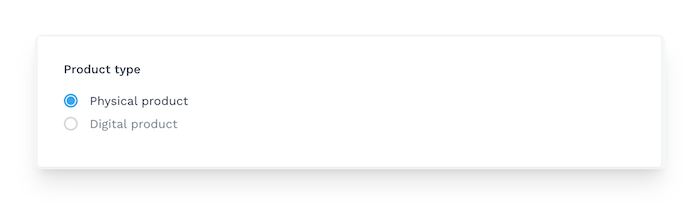
Product type
This is where you’ll select the type of product you wish to list on your website. You’re able to choose between physical or digital products.
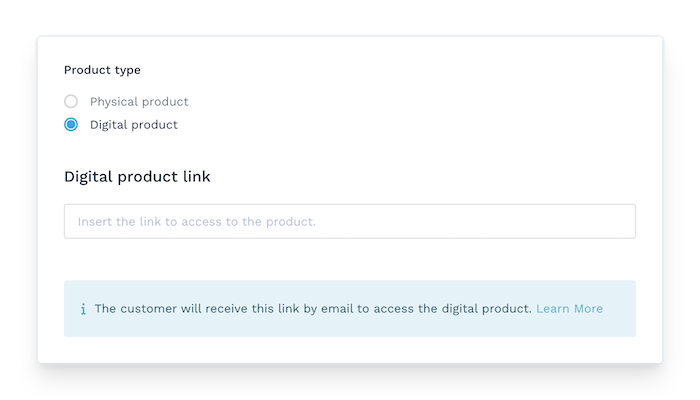
If you sell digital products, such as training courses, PDFs, audio files, or visual files—basically any downloadable files—you can add them to your product page.
Simply select “Digital product” and enter the link to your file, and you’re all set!
Description
Above all, don’t neglect this part. Even if you generate the base with artificial intelligence, you need to check the content and add your personal touch.
The product page is the only way you have to convince your visitors to buy this product. Put yourself in their shoes. They can’t touch the product. They probably have lots of questions.
It’s up to you to answer all their questions, but above all, it’s up to you to make your product ATTRACTIVE. And there’s no secret to that.
Put yourself in the consumer's shoes and explain what your product will do for them. What problems will it solve?
Keep this in mind. I still see far too many product pages with very little text or just a list of features. This may work if your buyer absolutely wants your product, but not for those who are just discovering it.
And it’s these people you need to target in order to get lots of sales.
It’s better to add a few products and take your time with the descriptions to make them really interesting than to add hundreds of products and rush your texts (or worse, copy those of your supplier or competitors).
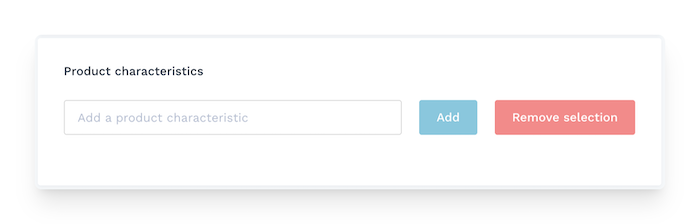
Characteristics
In this section, add important information about your product or service that’s relevant to your customer.
These features will be displayed on your public product page as a bulleted list, which is very helpful for your buyers to quickly understand your product.
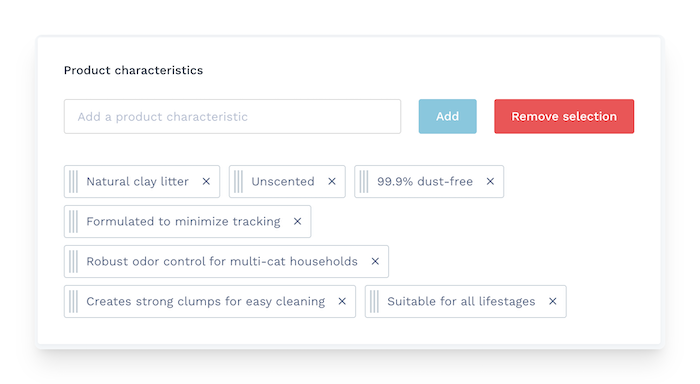
In our example of selling the Dr. Elsey’s cat litter, here are some features you could add:
- Natural clay litter
- Unscented
- 99.9% dust-free
- Formulated to minimize tracking
- Robust odor control for multi-cat households
- Creates strong clumps for easy cleaning
- Suitable for all lifestages
Product price
Here, you can enter the price of your product and promote your store with special offers.
You can easily run promotions, sales, flash sales (with a countdown timer), or even set tiered pricing based on the quantity ordered by your customer.

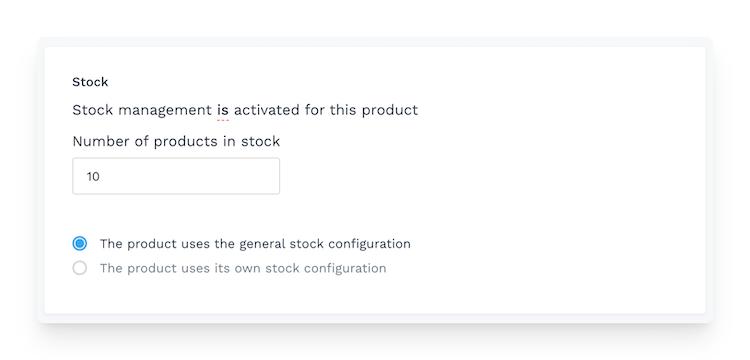
Stock
You must also indicate the stock you have for this product.
Weight and delivery
Next, you need to enter the weight of your product.
WiziShop will automatically configure a delivery method, which you can edit later in the shipping step.

Photos
You can add more photos of your product here.
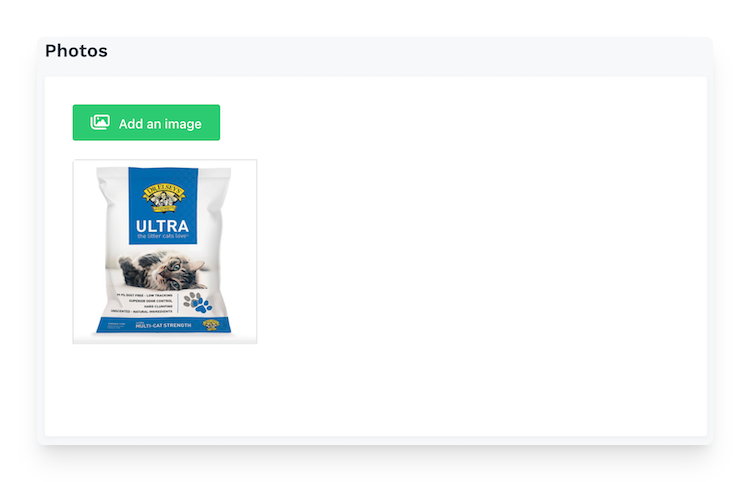
Use a resolution of 1000 x 1000 px so your visitors can zoom in and see the details of your product.
The quality of your photos is crucial to the success of your online store. Make sure to use high-quality photos. They should be clear (your product should be easily visible) and show your product in context.
To illustrate my point, here are a few mistakes you should definitely avoid:
- a T-shirt hanging on a hanger (it’s better to show a T-shirt being worn so that people can see it in context and appreciate its cut);
- spices piled up on a table (you probably sell your spices in a jar or pot, so show your packaging—that’s what your customers will be ordering); and
- a blurry or too small photo.
→ To take beautiful product photos, I invite you to read our guide on product photography.
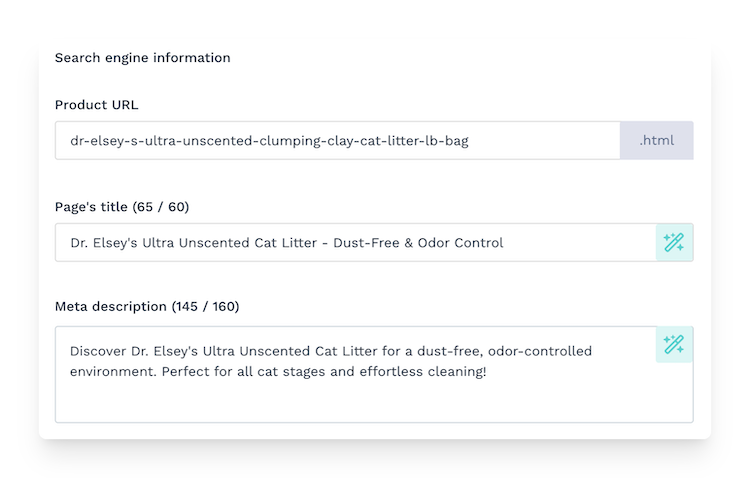
Search engine optimization
Finally, if you generated your product using AI, search engine optimization (SEO) elements will be automatically filled in and optimized: URL, title, meta description.
As a reminder, SEO is the art of optimizing a website or page so that it appears as high as possible in search results (such as on Google or Bing). In other words, it’s what allows internet users to easily find your site when they type in specific keywords such as “ice cream maker” or any other commercial query.
Why fill in the SEO sections on your ecommerce product listings? Because by correctly filling in the titles, descriptions, keywords, and SEO tags, you’ll achieve the following:
- Your product will be better positioned on Google.
- You’ll attract more visitors without having to pay for advertising.
- You’ll increase your sales, because your products will be more visible and accessible to people who are really looking to place an order online.
In summary: good SEO = more visibility = more sales.
On WiziShop, these settings are not final; you can of course change them if necessary.
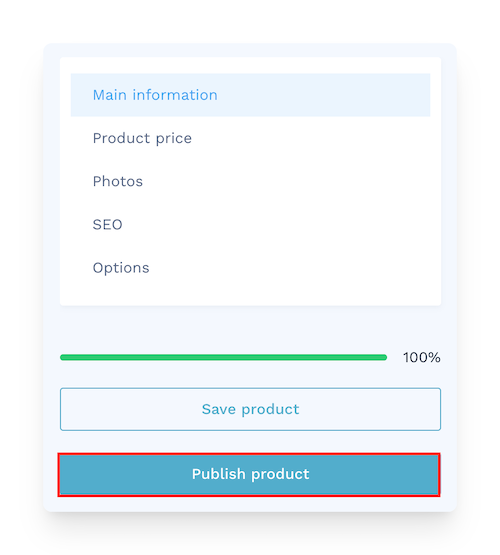
Congratulations, you’ve completed the product addition step. You can now publish it on your store!
→ To take it to the next level, I would recommend you read our article on how to create the perfect product page for your ecommerce site.
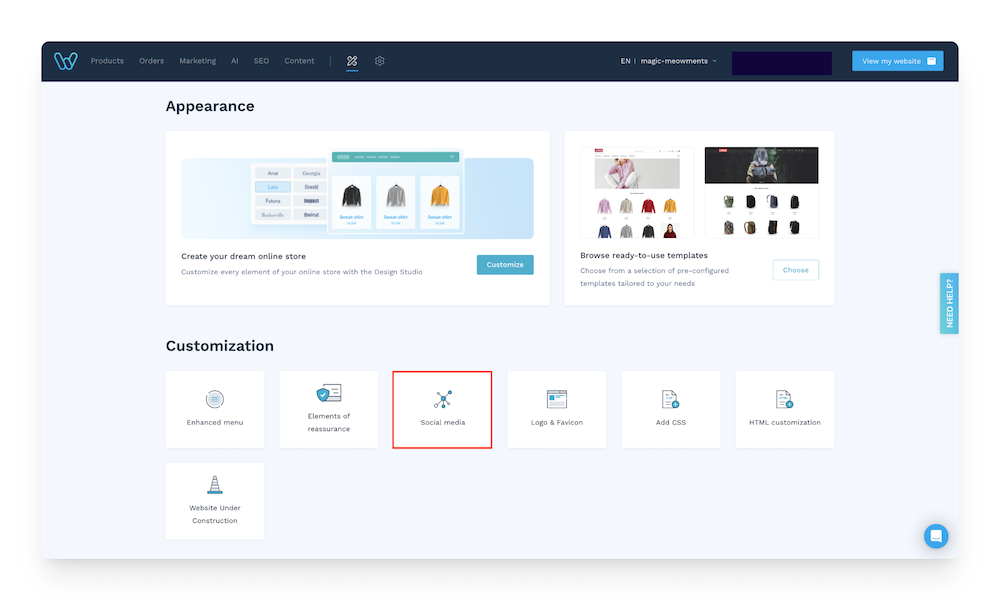
3. Set up the appearance of your ecommerce website
We now come to the design stage (this is often the one that people enjoy the most!).
This is also the step where you’ll set up your template, add your logo, etc.
Template choice
Browse through our selection of ready-to-use templates.
You can get a preview by clicking on the “eye” icon.
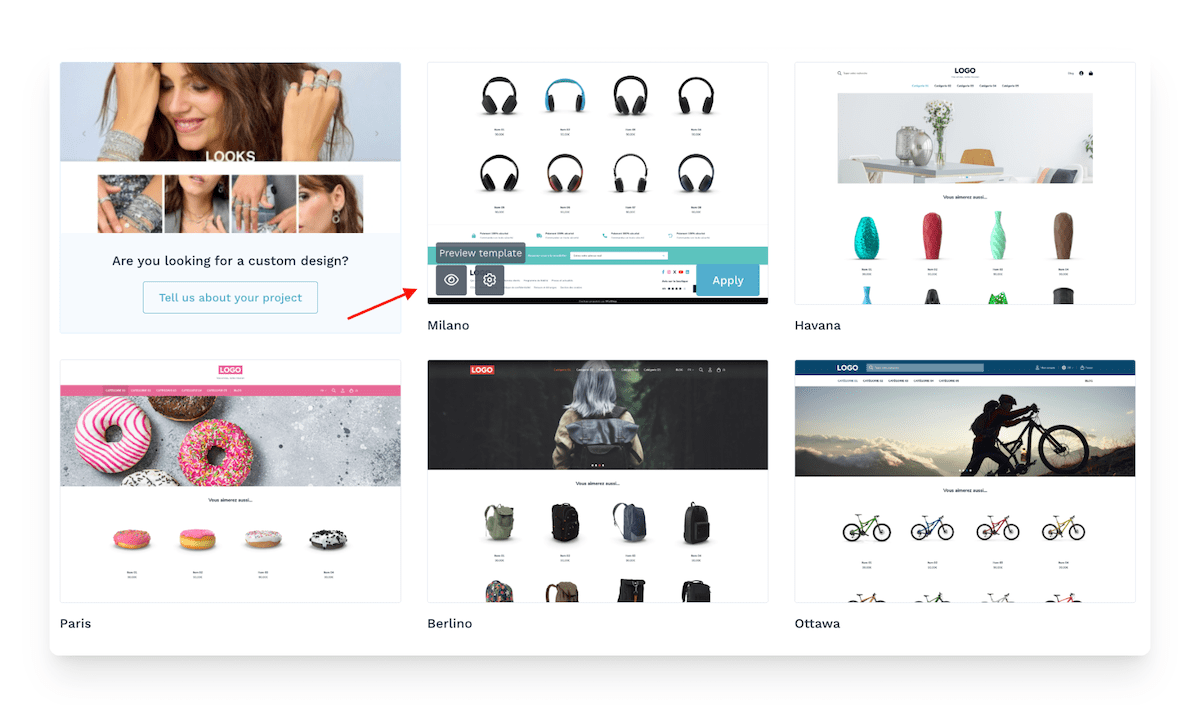
Of course, you’ll then be able to adapt and customize it to your liking. Or rather, to your business and target audience.
For example, if you love unicorns, but you’re targeting Formula 1 fans…
Okay, you get the idea… No need for me to elaborate further, right?
Logo
Now, let’s take the customization of your store a step further to make it truly yours.
Let’s start by adding your logo.
Still in the Appearance section, click on “Logo & Favicon” box.
Once in this space, you can import your “Logo” and your “Favicon.”
Import your logo if you’ve already created one.
And if you haven’t yet, there’s no need to hire a designer for $2,000 to create one (I would even advise against it!).
With the Canva tool, you can create a simple and elegant identity that reflects your image.
But before you click on anything, ask yourself the following:
- Is my world more gentle and poetic? Or is it punchy, vibrant, and bold?
- Do I want my customers to feel serenity, joy, movement, raw energy?
- Which brands or designers inspire me visually and why?
Because your visual identity isn't “just for looks.” It’s a language. A first impression. A visual echo of what’s in your heart.
You can also find inspiration using ChatGPT with a customizable prompt:
Prompt example:
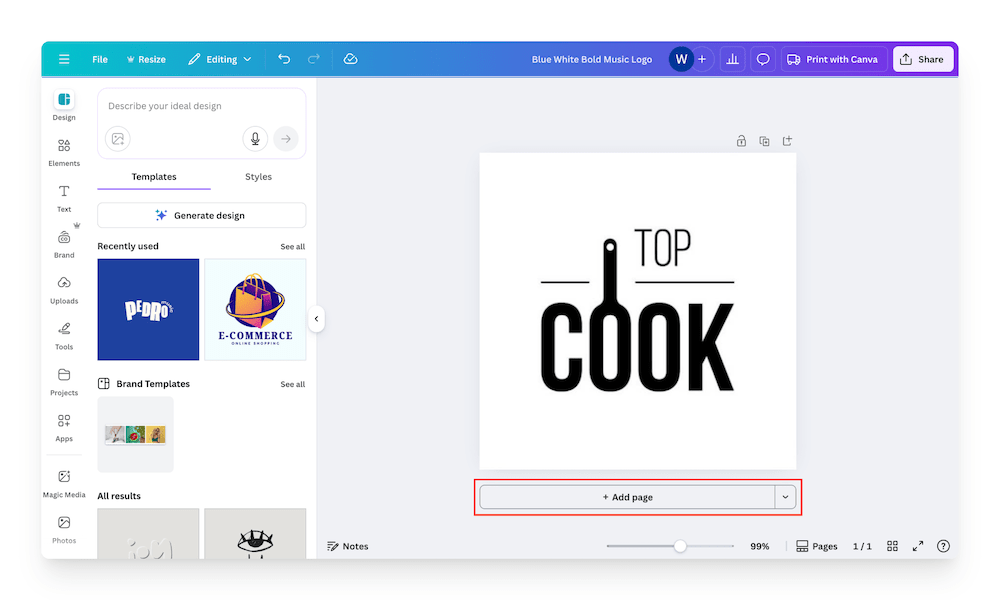
Please create an original logo for my ecommerce brand called [Brand Name], specializing in [industry/type of products]. The desired style is [modern/minimalist/vintage/futuristic/playful/premium, etc.], with a color palette of [specify colors or “free”]. The logo must reflect [brand values: innovation, trust, accessibility, ecology, performance, etc.], be legible on digital and printed media, and usable in monochrome. It may include a pictogram or icon related to [symbolic element linked to the brand's activity or universe], and the typography should be [bold / thin / handwritten / geometric / sans serif, etc.]. Generate several possible variations and specify the intention behind each proposal.Here’s an example for my kitchen product brand “Top Cook”:
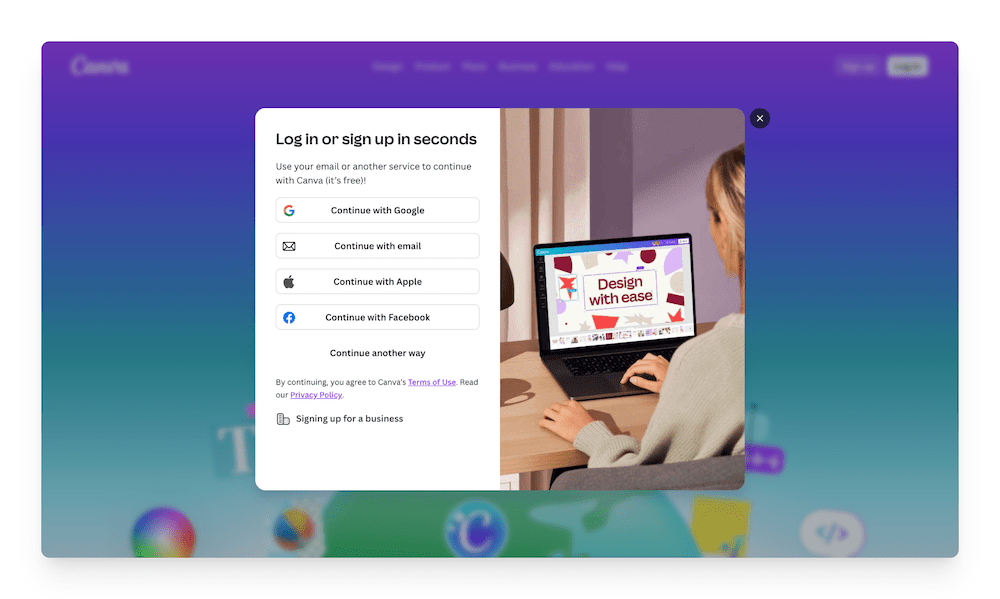
Logo tutorial in Canva:
Create a Canva account or log in to your account: If you don’t have an account yet, you can create one for free at https://www.canva.com. Once logged in, you’ll access the creation interface.
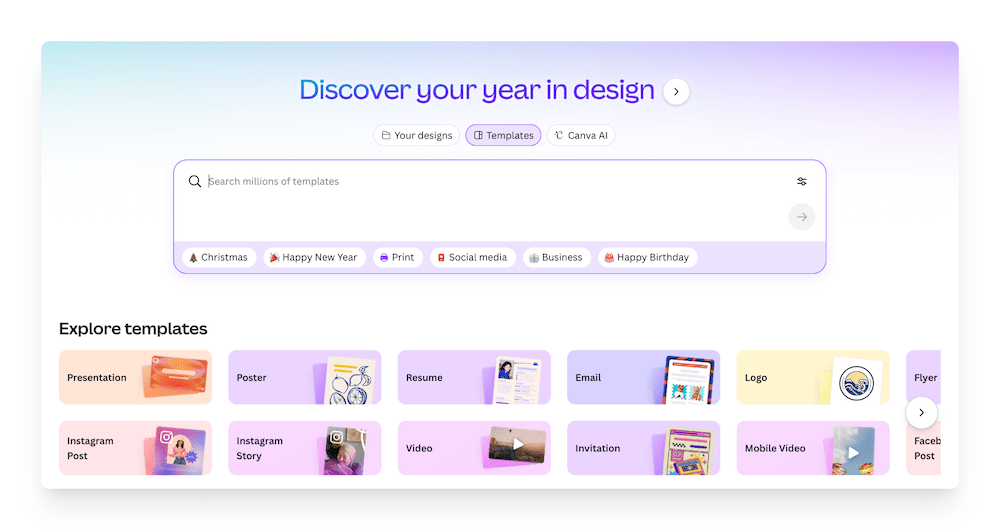
- Search for “logo” in the search bar: On the homepage, type “logo” in the search bar at the top of the screen. Canva will offer you a wide range of pre-designed templates suited to different styles and industries.
- Choose a logo template as a starting point: Browse through the available templates and select the one that best matches your brand identity. You can then customize it entirely.
- Edit the text: Click on the text in the template to replace it with your brand name or slogan. You can adjust the font, size, spacing, and color of the text to suit your preferences.
- Add graphic elements: Use the sidebar to integrate icons, shapes, or illustrations related to your brand universe. You can search for elements in the built-in library.

- Adapt the colors to your graphic charter: Click on the logo elements to change their colors. Be sure to use colors that represent your brand to ensure visual consistency.
- Test different variations: Feel free to duplicate your design (Ctrl+D or “Duplicate Page” button) to create multiple versions and compare them.
- Download your logo: Once you’re satisfied with the result, click on “Share” then “Download.” Choose PNG format for a version with a transparent background (option available with Canva Pro), or JPG for standard web use.
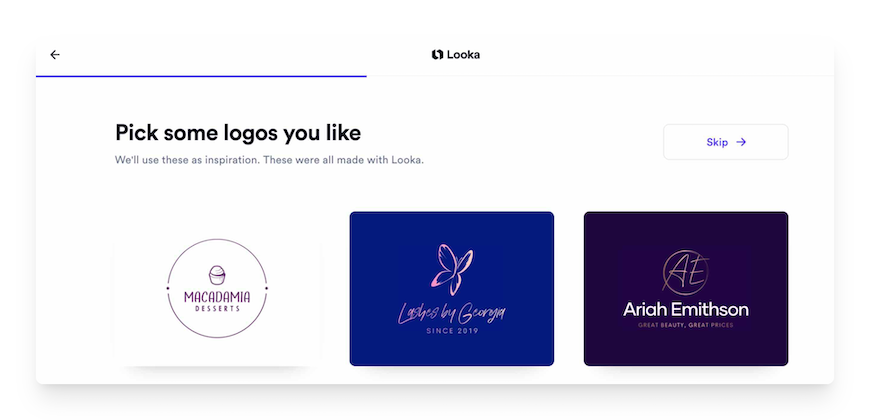
Once you’re in the Looka tool, follow the steps. The AI will generate dozens, even hundreds, of logos for you. As soon as you find one you like, you can customize it and change the font, symbol, or color palette. Then simply import it to your store, and you’ll see it appear at the top of your ecommerce page.
Congratulations! Your website now has a logo that reflects your brand!
Now, let’s personalize your homepage to make it truly unique.
Homepage creation
Customizing your homepage isn’t listed as a step on the admin panel’s homepage, but I’m mentioning it here too because I’m sure you’ll enjoy it!
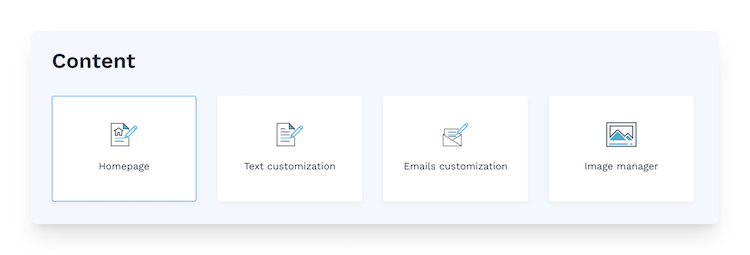
Go to Content > Homepage.
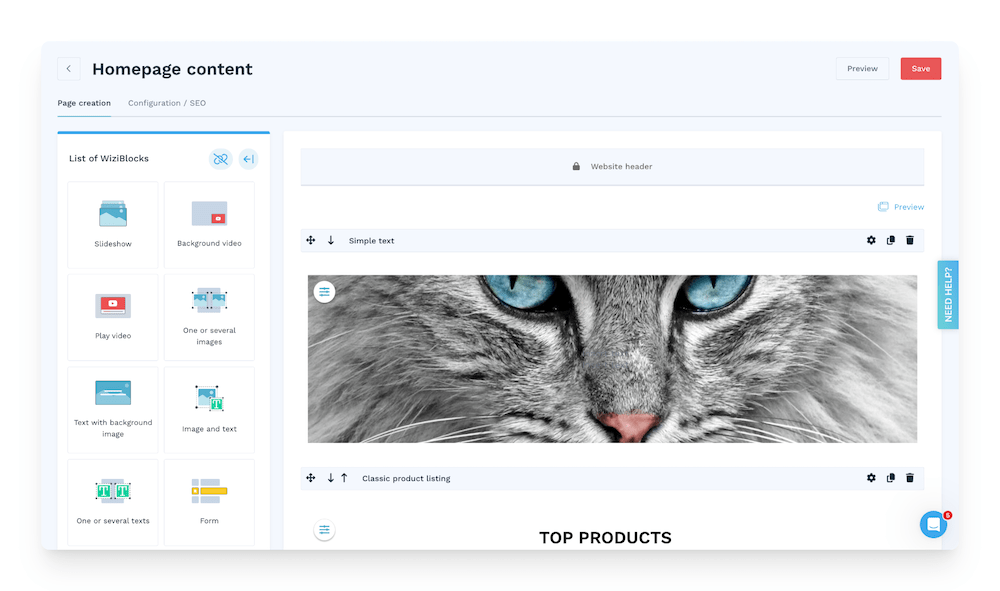
Here, you can fully customize your homepage using our intuitive drag-and-drop design system: WiziBlocks.
And you may be wondering: what exactly are WiziBlocks?
It’s a layout system developed by WiziShop. A unique system!
With WiziBlocks, you can create your home page and structure it however you like. You’ll be able to give free rein to your creativity.
With this interface, we’ll create your store’s homepage. You’ll see that it’s very quick and simple.
As I mentioned, your store is 80% complete. We’ve already created a template and a block layout for you. All you need to do is keep the layout and replace the blocks with your products and images, and don’t forget to customize the text.
Later, you can of course further customize your page by modifying the pre-configured blocks and adding new ones: slideshow, video, product highlight, countdown timer, social networks, testimonials, etc.
To modify the content of a WiziBlock, click on an item and you will be able to enter your information. It’s very simple.
Canva’s integration into the image manager allows you to create custom visuals and follow all the configuration steps of your images to the letter without leaving your administration space!
If you want to see the initial results of your work, you can click on “Preview.”
Now that you know how WiziBlocks work, you can let your imagination run wild.
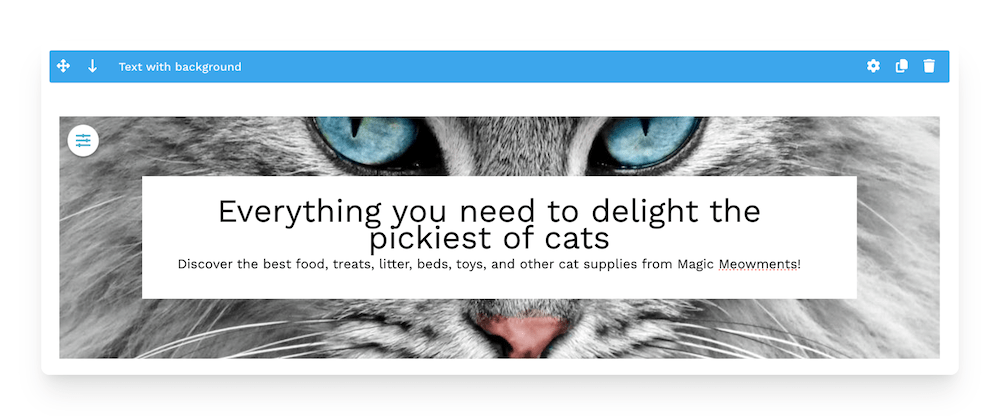
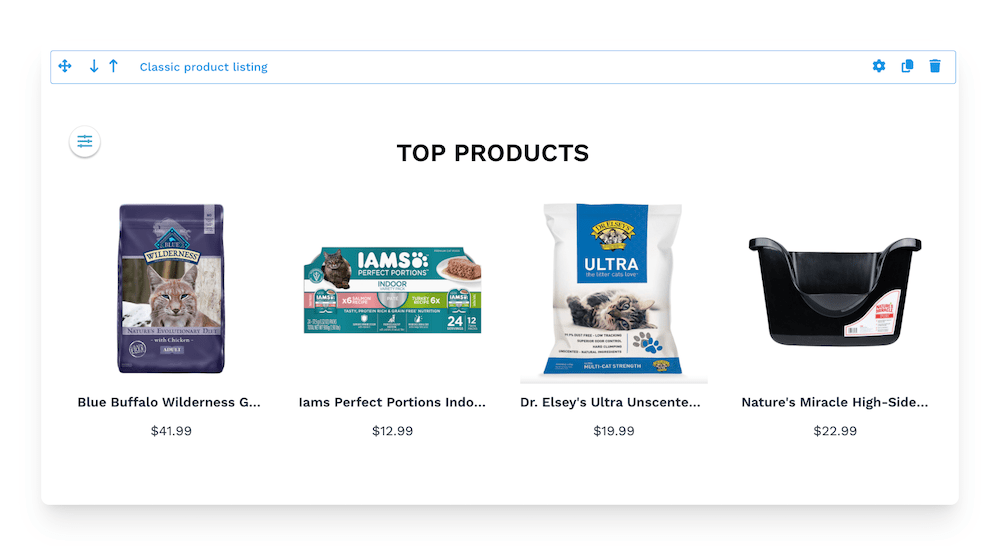
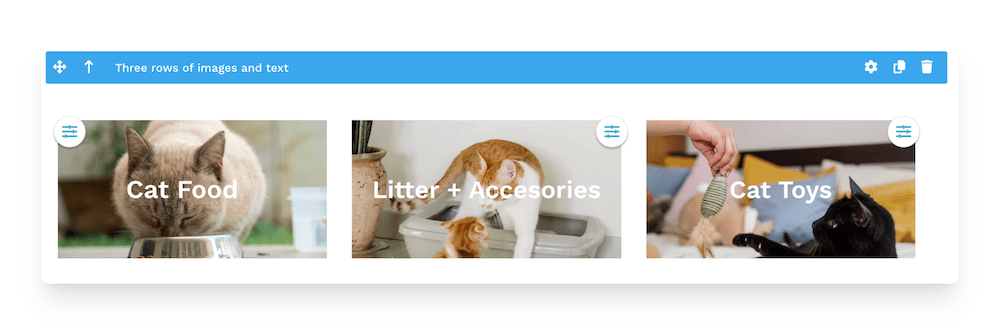
Here is my rendering after customizing the three WiziBlocks added by default:
- “Text with background” WiziBlock
- “Classic product listing” WiziBlock
- “Three rows of images and text” WiziBlock
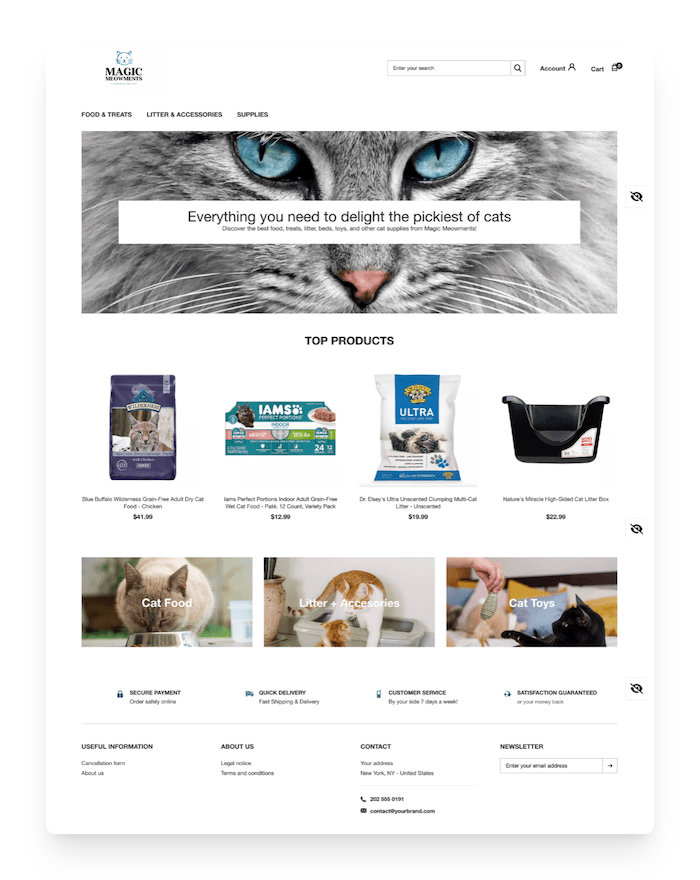
And here’s what happens when I click the “Preview” button:
If your homepage is ready and you want to put it online, simply click “Save.”
→ Be sure to consult our many resources to better understand and use WiziBlocks. Start with the article providing an overview of WiziBlocks in our Help Center.
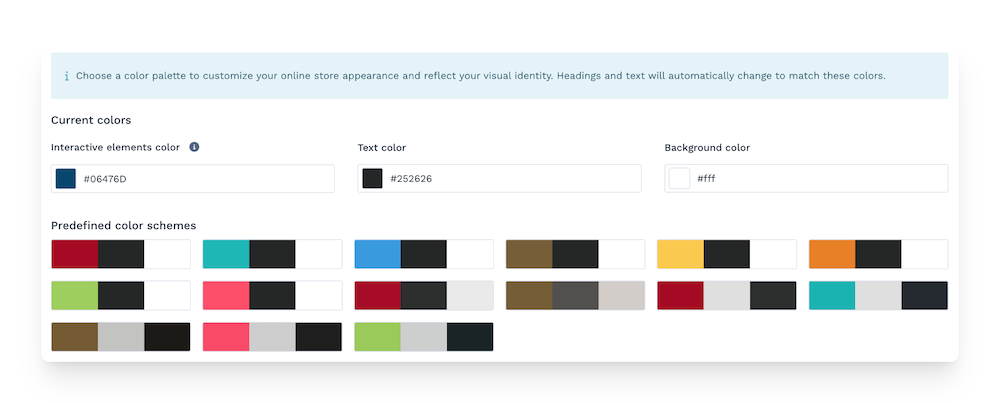
Choice of colors and fonts
Let’s finalize the customization of your store.
I’m going to show you how to change the colors and font of the text on your site.
Still in the Appearance tab, click the “Customize” button.
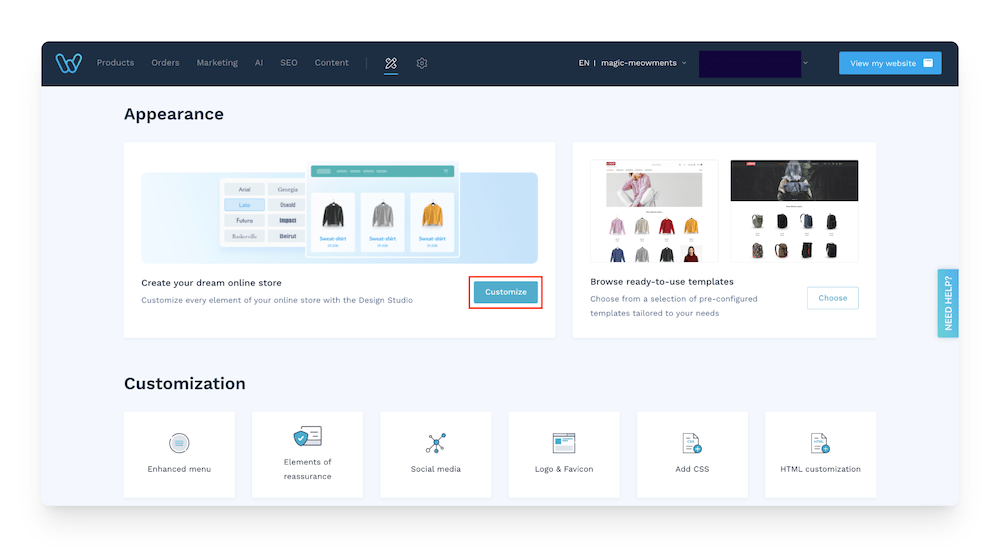
In this section, you can apply changes in the left column and see the results on the right.
You’ll be able to do the following:
- Modify the layout of the site.
- Choose the dominant colors for your site. We offer several color schemes, but you can also choose your own using the last button with the cogwheel. You’ll see that it’s magic: titles, buttons, and text automatically adjust to maintain harmony and strong contrast.
- Change the width of the site.
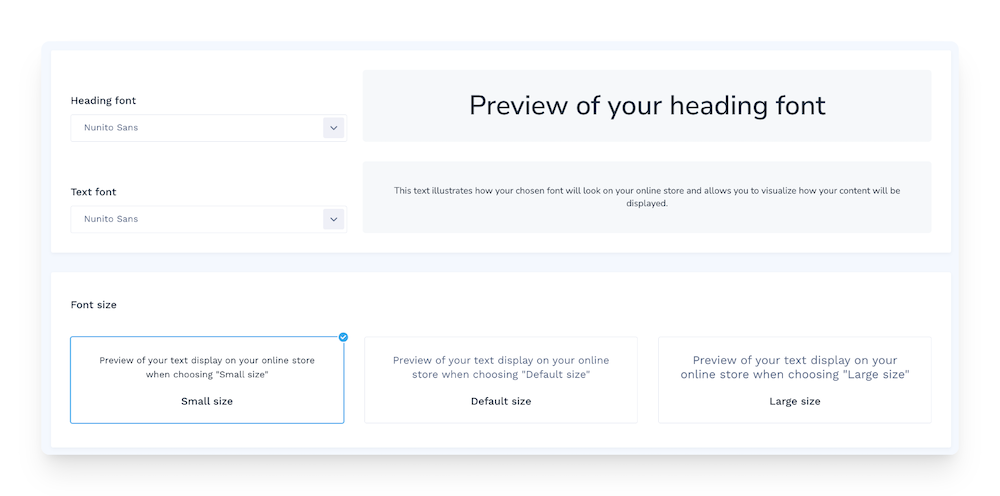
- Change the size and type of font.
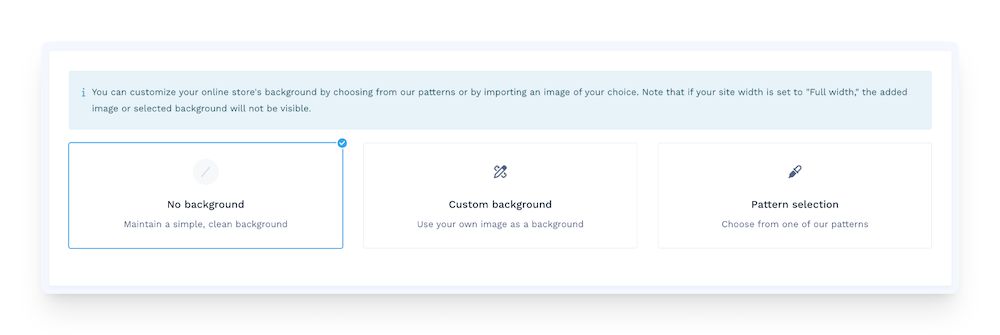
- Choose a background for your site. You can choose from the available backgrounds or upload your own image. Of course, the background won’t be visible if you’ve set the site width to its maximum. However, if you’ve chosen a narrower width, the background will give your site a unique style.
- Add and modify custom elements, such as product badges, buttons, a footer, and more.
Remember to save all your changes before exiting this interface. To do so, click on the “Save” button.
Well done! You’ve completed the first part of customizing your site.
You’ve added a logo, created your home page with WiziBlocks, and changed the colors and font of your store.
To make your store reflect your image, you still need to set up two elements.
Social media
In the “Social media” section of the “Appearance” tab, you’ll find a space that allows you to display your social network buttons at the bottom of your pages, again in just a few clicks.
Copy the URLs of your social networks and paste them into the designated spaces.
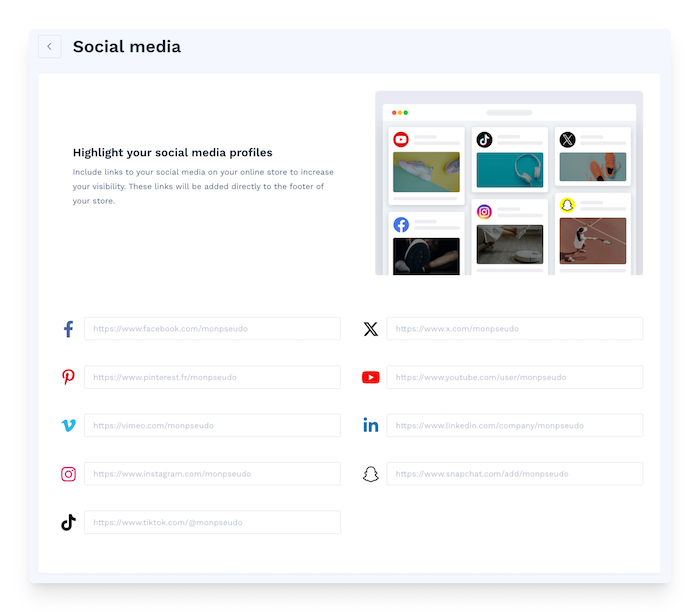
You'll see that the buttons will automatically appear on your site in your footer! Nothing could be simpler.
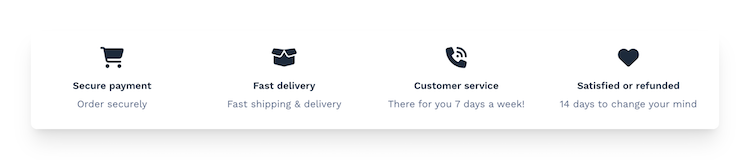
Reassurance
Reassurance or trust elements are essential in ecommerce. It’s not just marketing; it’s central to your success.
You know, those little icons with secure payment, fast shipping and delivery, and customer service that you often see at the bottom of websites:
Although it’s possible to remove them, I don’t recommend doing so.
Why? Simply because these elements will help your customers trust you.
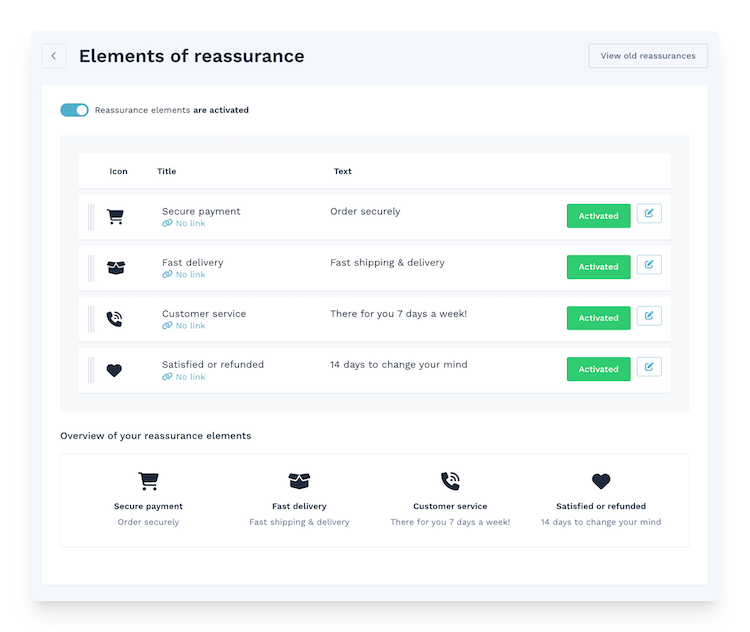
By default, your store displays four reassurance elements. You can modify, move, and customize them.
Again in the “Appearance” tab, click on “Elements of reassurance.”

Think about all the elements that can reassure your customers. For example:
- Secure payment
- Fast delivery
- Your responsive customer service/after-sales service
- Return deadlines for products
- A satisfaction or money-back guarantee
- Country where the products are manufactured
- The fact that a major media outlet has talked about you or your products
- Number of customers or orders you’ve already fulfilled
- etc.
Change the icons and text and save your changes. Your reassurance elements are automatically updated on your site!
If you have technical and IT skills, or if you’d like to work with a web designer or agency, you can further customize the graphics of your WiziShop store. You can add CSS stylesheets and modify your site’s HTML code by going to the Appearance tab > Add CSS or HTML customization. You’ll then have complete freedom.
4. Get your domain name
The domain name is your online store’s address (for example: www.mystore.com).
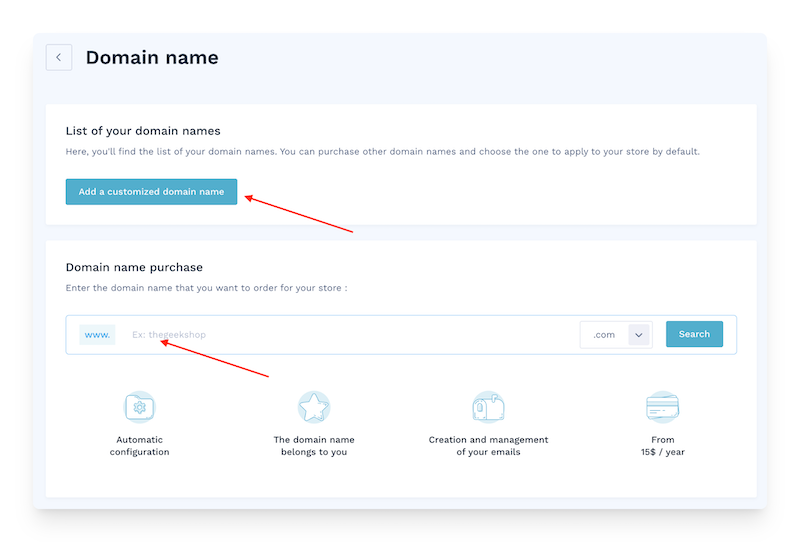
For the next step, you’ll need to add a custom domain. From the homepage, click on “Add a custom domain.”
It’s entirely possible to get a free domain name in the format “.mywizi.” However, this solution is not recommended for your branding, as customers and potential partners will understand that you have not purchased your domain name. It looks a bit amateurish... So here’s how to customize it in one click.
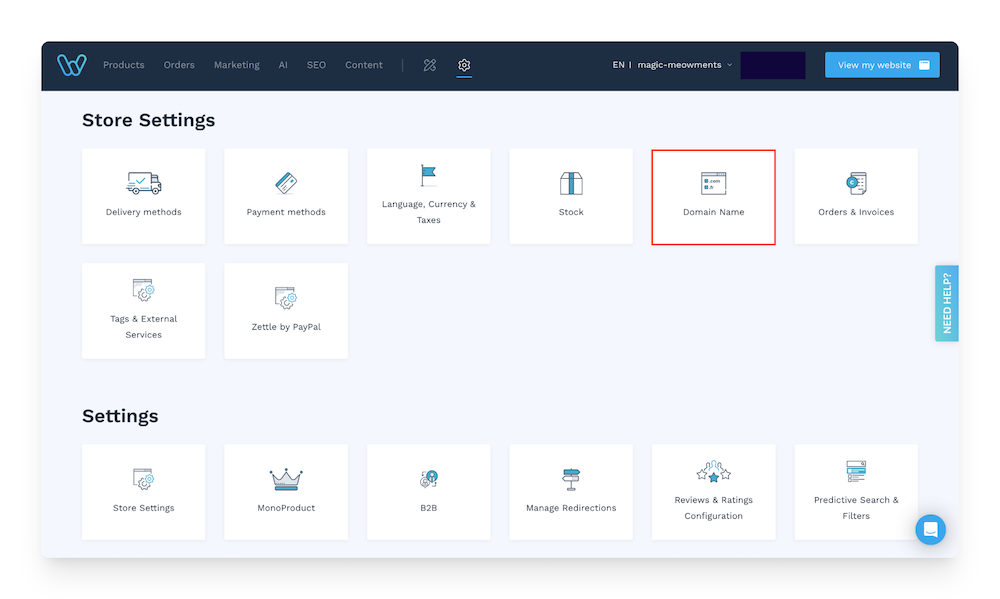
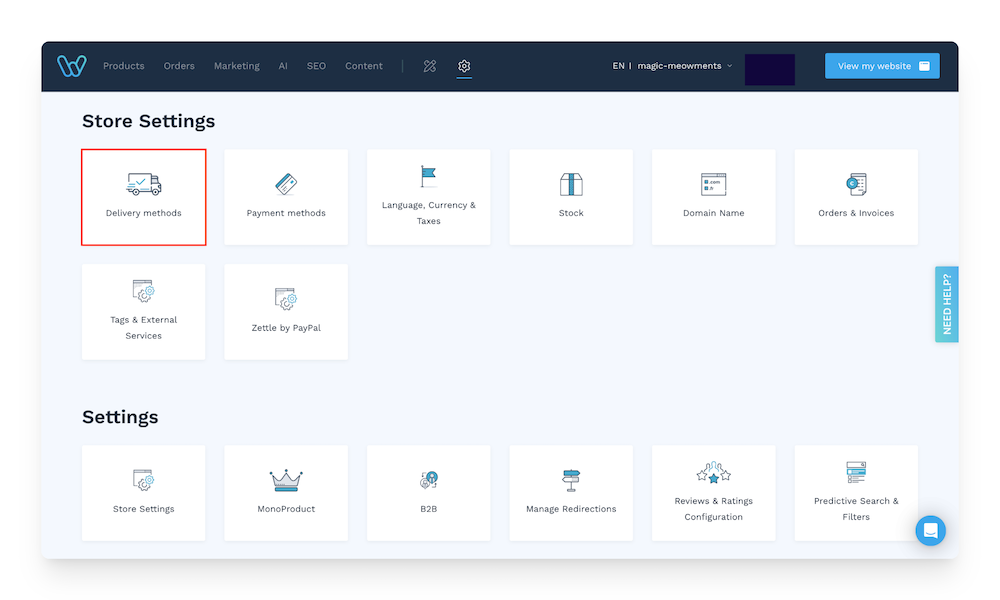
Click on the step on your dashboard home page or go to Settings [gear icon] > Domain Name.
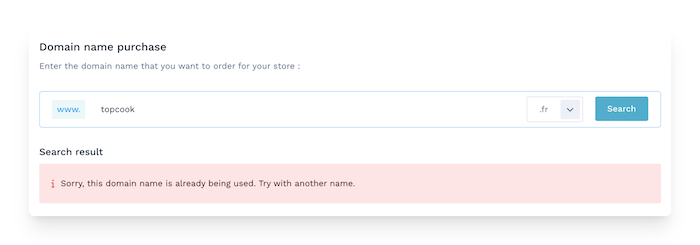
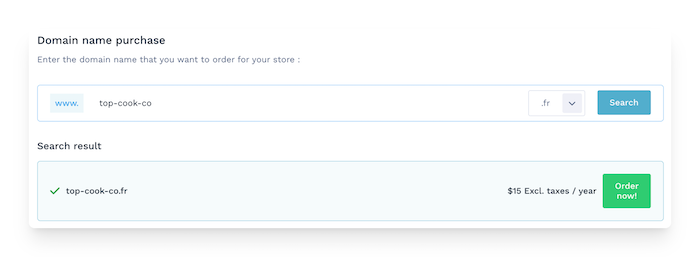
In the search bar, type the domain you want to add, select an extension (fr, com, es, it, etc.), then click on the “Search” button.
You’ll encounter one of two scenarios:
- The domain you selected is not available. Try again with variations: top-cook.com or other extensions: topcook.com | topcook.shop
- The domain is available. All you have to do is click the “Order now!” button.
All you have to do now is configure your domain name.
The process of setting up your domain name on our platform is automated.
You don’t need to perform any technical actions, which allows you to quickly move on to the next stage of developing your ecommerce project.
Domain names start at $15/year, so you’ll need to provide your payment details. The system will guide you step by step through this process.
Once you’ve ordered your domain name, it will be automatically connected to your WiziShop store within a few minutes.
This step marks a key moment in the launch of your project!
5. Finalize the configuration of your website
We’ve now reached the final step in creating your online store: adding your delivery and payment methods.
Click “Finalize the configuration of your site” on the initial list.
Be careful: If you sell digital products, I recommend completely disabling inventory management at this stage.
Set up delivery
If you sell digital products, you can skip this step; you don’t need to add anything.
For the sale of physical products, to set up delivery, you must click on “Delivery methods.”
WiziShop offers a wide range of options to suit various needs.
You can add several delivery methods to ship your products, e.g., standard shipping, express shipping, and delivery to a pickup point.
In this “Delivery” section, you’ll set up how your products will be shipped to your customers. Each section corresponds to an important setting to ensure that your customers are satisfied and that everything works correctly.
Here is a detailed explanation:
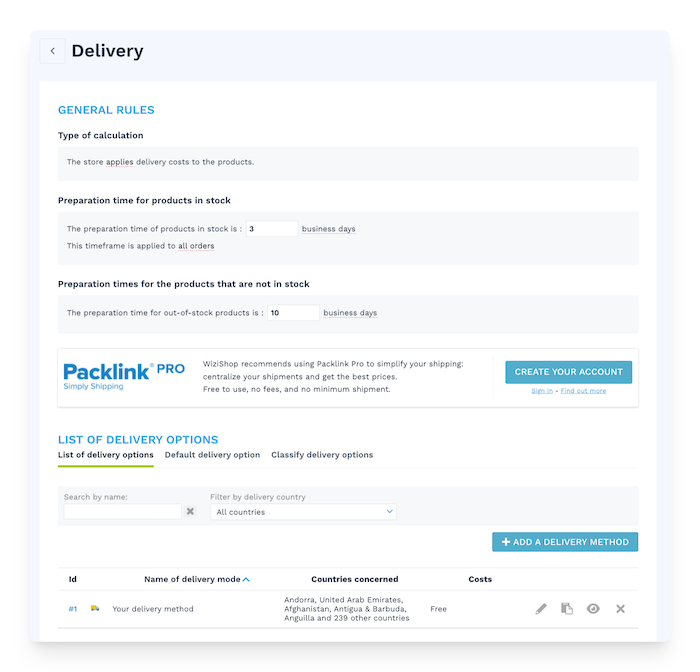
1. General rules
- Type of calculation: This means that your store will automatically add shipping costs to the price of the products you sell.
- Simple example: If a customer buys a Ninja Creami that costs $239, and your shipping costs are $10, then the customer will pay $249 in total ($239 + $10).
2. Preparation time for products in stock
- What does “product in stock” mean? It’s a product that you already have at home or in your warehouse, ready to be shipped.
- Preparation time: This is the time it takes you to prepare and pack the package before shipping it. Say that for your store, you’ve indicated: 3 business days. This means that you have 3 working days to prepare the package (weekends and holidays do not count).
- Simple example: If a customer orders on Monday, you must prepare the package by Thursday at the latest.
3. Preparation time for products that are not in stock
- What does “product not in stock” mean? It’s a product that you must first order from your supplier or manufacture before shipping.
- Preparation time: Say that you’ve indicated 10 business days. This gives you more time to receive the product and then ship it.
- Simple example: If a customer places an order on Tuesday, you have until Tuesday two weeks from then (10 business days) to prepare the shipment.

4. WiziShop suggestion: Use Packlink Pro
- What is Packlink Pro? It’s a service that allows you to send your packages more easily and often at a lower cost.
- Why use it? You can simplify your shipping with Packlink Pro by centralizing your shipments. Plus, it doesn’t cost extra to use, and there’s no minimum shipment.

5. Delivery options
- What is a delivery method? It’s the way in which you offer to send your products to customers (for example, delivery by the postal service, delivery to a pick-up point, express delivery, etc.).
- In your current setup: WiziShop offers dozens of delivery solutions that you can add or remove according to your needs and the requirements of your products.
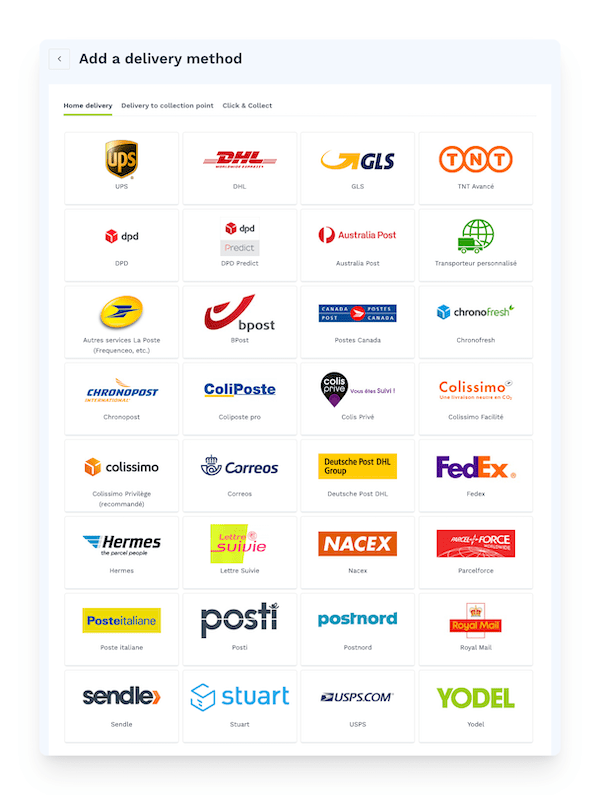
You can easily add several, as well as combine home delivery and delivery to a collection point.
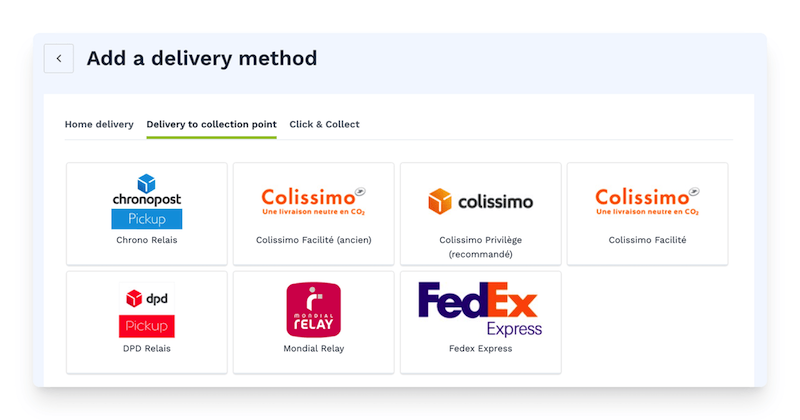
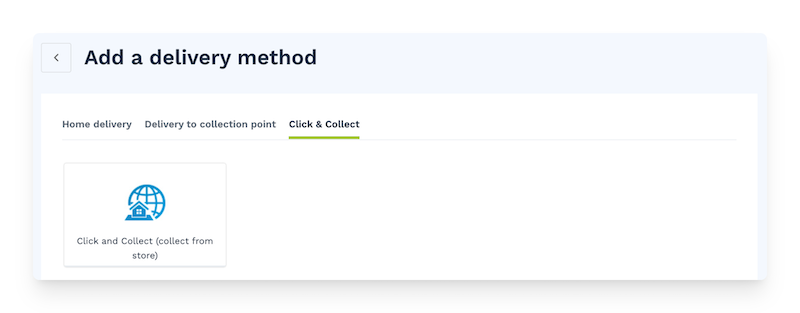
Bonus: WiziShop offers the option to add in-store pickup of purchases at relay points, as well as click and collect!
6. Additional options
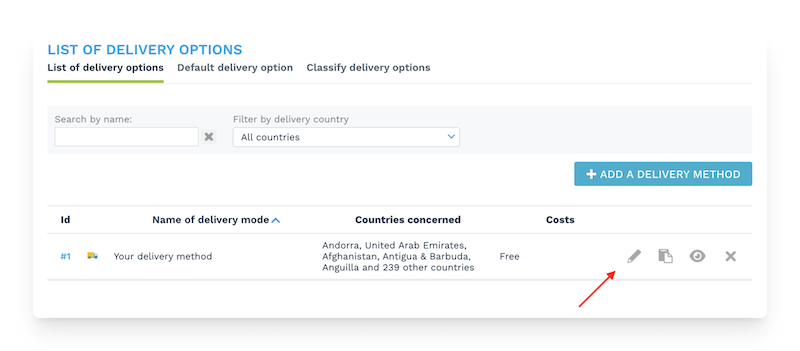
- Default delivery option: This is the delivery method that is automatically offered if your customer doesn’t choose one themselves.
- Classify delivery options: if you later offer several types of delivery, you can choose the order in which they’re displayed.
- Filter by delivery country: You can display the delivery methods corresponding to a specific country (for example, only for Belgium or Spain).
To help you launch your store quickly, we’ve already added a default delivery method and pre-configured it for you. If you want to make changes, simply click on the pencil icon to customize the rates.
Set up payment methods
To set up the payment methods available to your customers, you need to go to the “Payment methods” section.
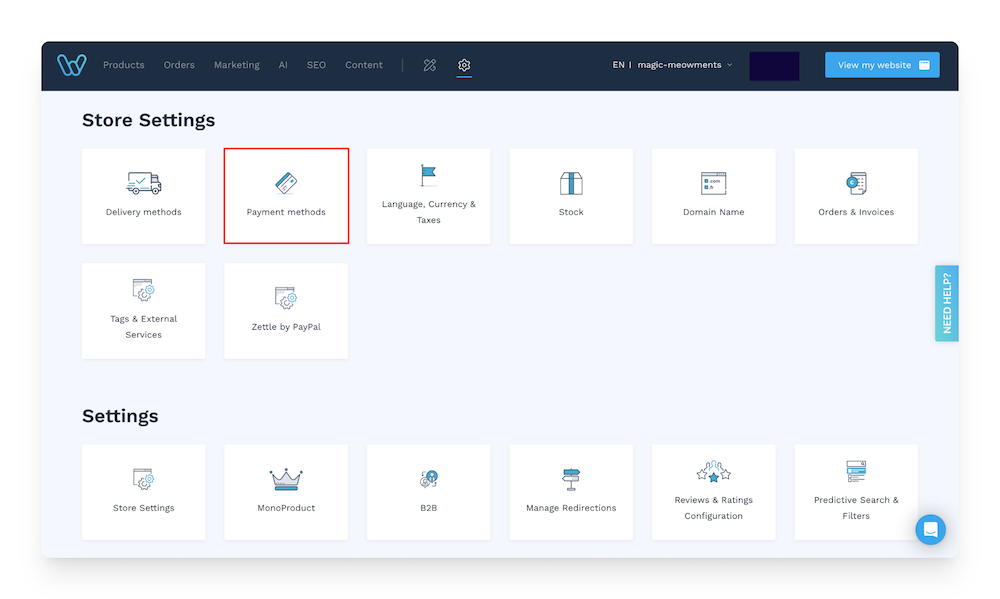
WiziShop offers around 50 online payment solutions. They’re already pre-installed, so all you have to do is activate them in just a few clicks!
To get started, I recommend adding at least one credit card payment method. If you don’t already have a distance selling agreement with your bank, opt for a solution such as PayPal, which has no installation or subscription costs.
PayPal is an extremely popular payment method that allows you to accept payments from users with a PayPal account, as well as bank cards and local payments.
PayPal tutorial:
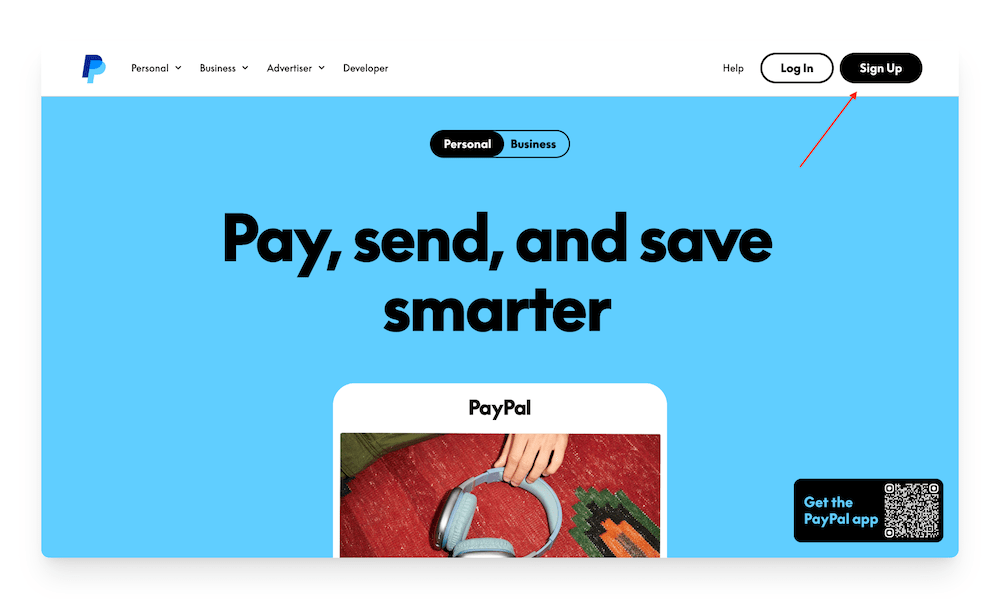
1. Go to the PayPal website
- Open your web browser (such as Google Chrome or Safari).
- Type “PayPal” into Google, then click on the link that takes you to the PayPal website.
2. Click on “Sign Up”
- Once on the PayPal website, look for the “Sign Up” button in the top right-hand corner.
- Click on it.
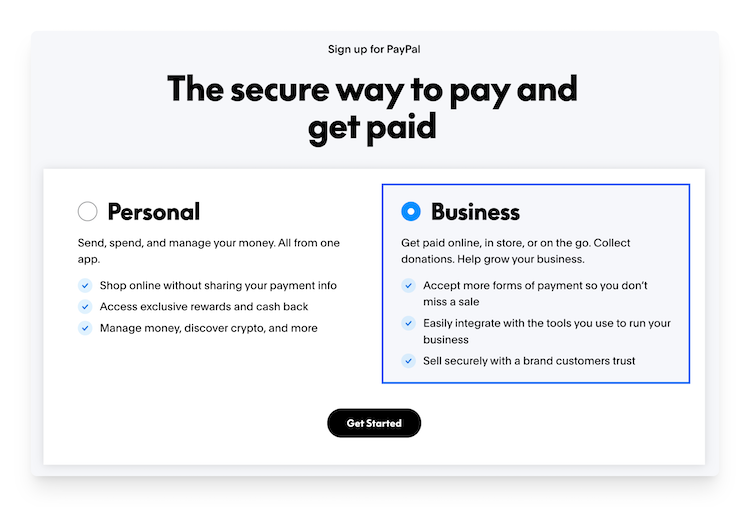
3. Choose a “Business” account
- PayPal will ask if you want to create a personal or business account.
- Select “Business.”
- Click “Get Started.”
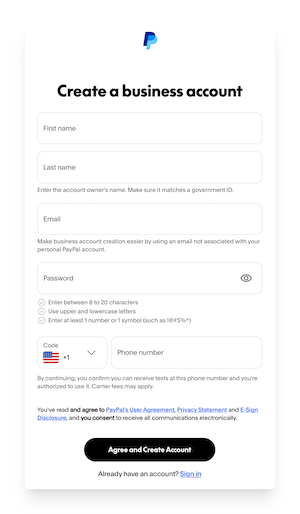
4. Fill in your information
- PayPal will ask for your email address (choose a professional email address if possible).
- Also enter a secure password.
- Next, they’ll ask you for information about your business:
5. Describe your business
- They’ll ask you a few questions about your business (for example: do you sell physical products? Online services?).
- Choose the option that best matches what you sell.
6. Verify your account
- PayPal will send you an email to confirm your address.
- Open your email inbox, find the email from PayPal, and click on the link to verify your account.
7. Connect your bank account
- To receive your money, you’ll need to link your bank account to PayPal.
- PayPal will explain how to do this: they will send very small amounts to your account (a few cents) to verify that it is indeed you.
- When you receive these small amounts (usually within 2 to 7 days), you’ll return to PayPal to confirm them.
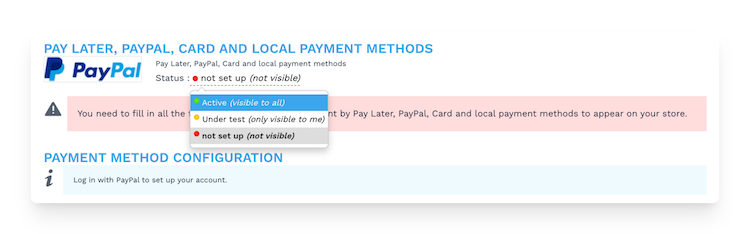
Once your account has been created, connect your PayPal account to WiziShop.
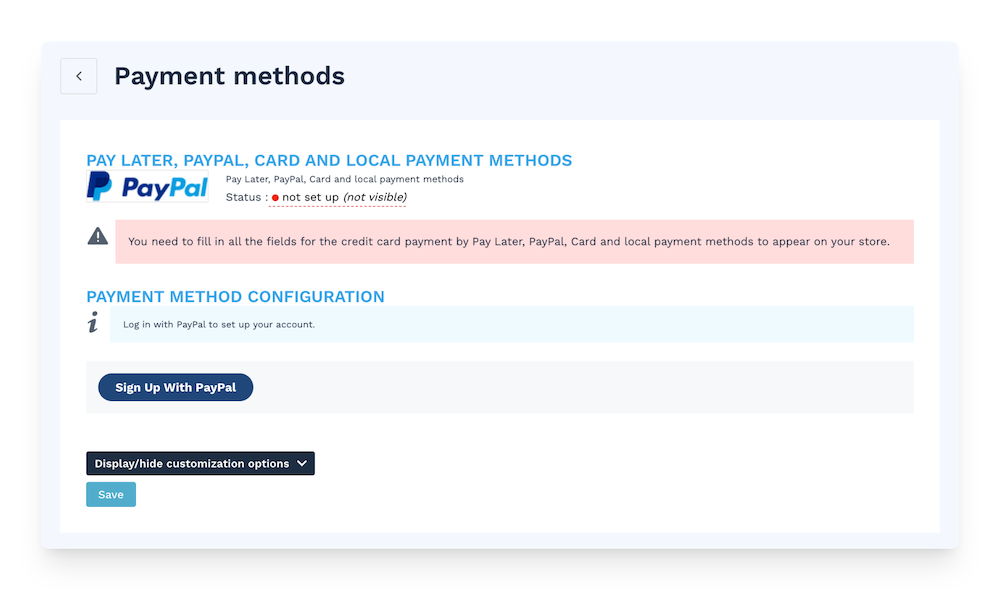
All you have to do is switch PayPal from “Not set up” (not visible) mode to “Active (visible to all)” mode.
Once the setup is complete, I recommend testing your store.
Add your product to the cart and simulate an order.
If you’re taken to the payment page and receive a payment notification on your PayPal app, then everything is set up correctly!
This test purchase will also allow you to put yourself in the shoes of a customer who arrives on your site, finds a product, enters the checkout process, makes a purchase, and receives a confirmation email.
This is an important step to ensure that everything is running smoothly and is set up correctly.
You have now customized your template, added a product, and set up your delivery and payment methods. You’re almost there.
Add your terms and conditions and legal notices
Complete your legal notices and terms and conditions of sale: these elements are fundamental to ensuring transparency and trust with your customers.
As a business, it’s important to comply with these legal requirements to establish a strong and lasting relationship with your clientele.
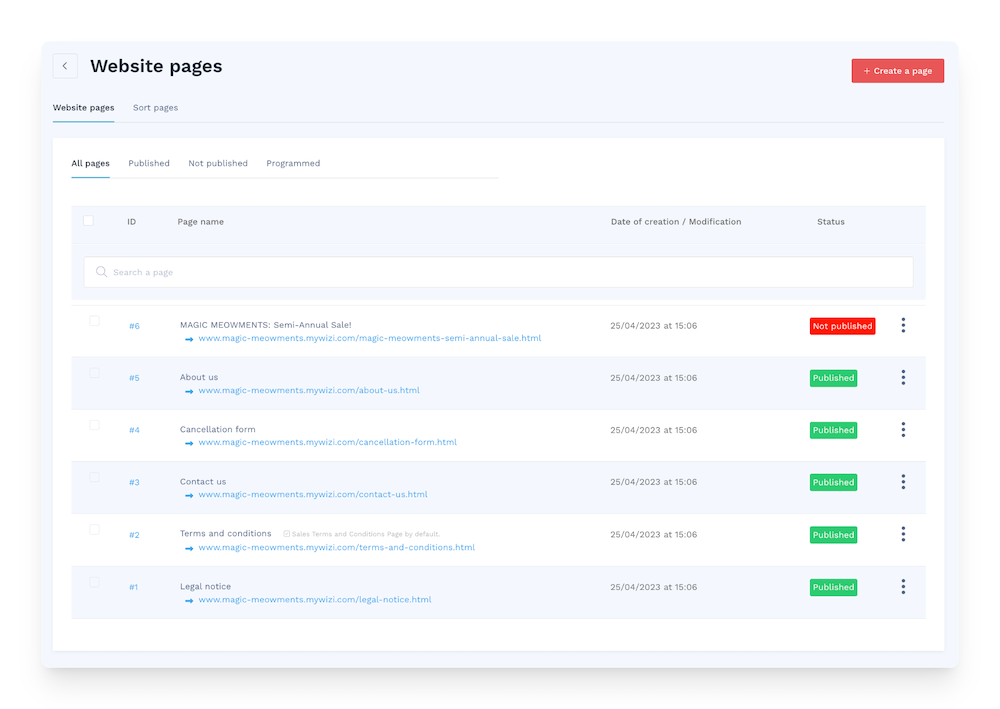
Go to the Content > Pages menu.
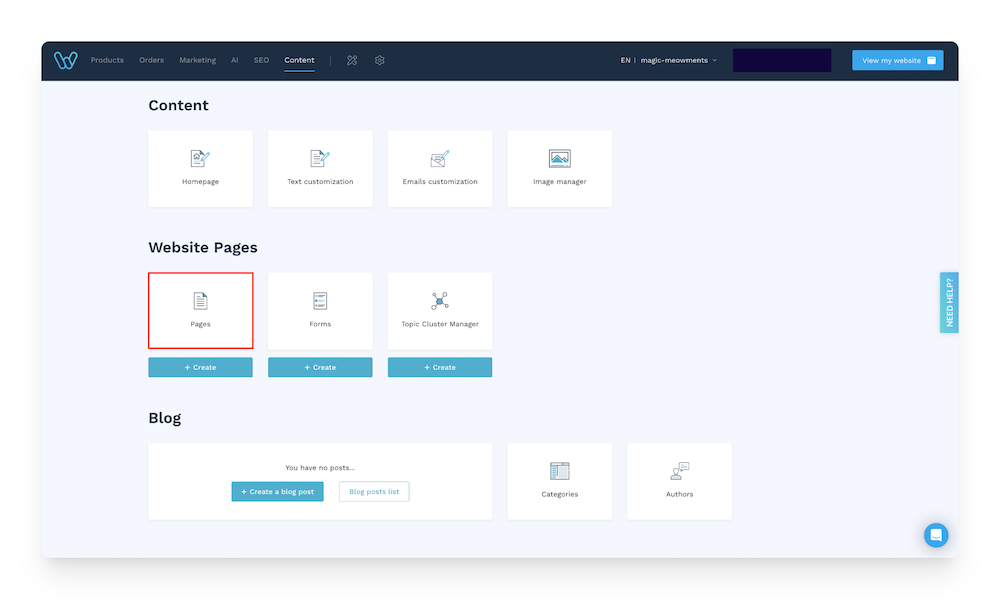
A list of highly recommended pages for your business is ready to use. You simply need to customize them by adding your information.
You’ll finally be able to launch your ecommerce website!
6. Your online store is ready! But before we finish…
I know you’re excited, and that’s completely understandable. You’re really close to your goal. You’ve just created an online store.
Before taking the crucial step of pressing the button to launch and officially open your online store, it’s essential to carry out a few key checks.
Keep this important tip in mind: don't aim for absolute perfection right from the start. The idea is to get your web project up and running quickly and make improvements to your site gradually.
Remember: the launch is just the beginning of your adventure in the world of ecommerce. The evolution and continuous improvement of your site will be the keys to your long-term success.
Return to the homepage of your WiziShop administration area. All you have to do now is click on the “Select a plan to launch your store” button and select the pricing plan that best suits your needs.
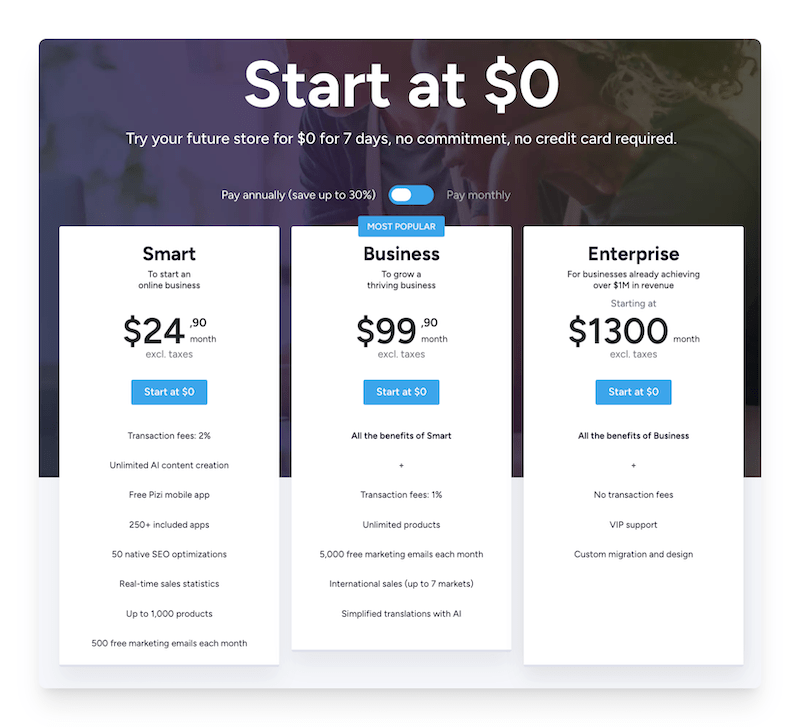
The three types of plans are tailored to the situation of your online sales business:
- The Smart plan is ideal for launching your online business.
- The Business plan is designed to support growing businesses.
- The Enterprise plan is aimed at companies that already have an annual turnover of over $1 million.
Once you’ve completed this step, that’s it—you’re now an e-merchant!
With everything you’ve just read, you’re already miles ahead of those who are waiting for “the right moment” to fall from the sky. Spoiler alert: it won’t happen. You’re on the move, and that’s what counts.
You have an idea, a desire, a passion. You’ve laid the foundation for a project that can become big, beautiful, profitable, and above all... deeply aligned with who you are.
But let’s be honest: ecommerce isn’t a straight line. It’s an arena. There will be days when you’re celebrating, and others when you're picking up the pieces and wondering why you got into this in the first place.
That’s the game.
What will make the difference is not perfection. It will be your ability to move forward. To test, to correct, to listen, to try again. To show your world, again and again, even when the algorithm sulks or orders stagnate.
Staying in the arena is the real challenge.
So keep going. Dare to make mistakes, learn faster. And above all, remember: every click, every post, every polished product description is a brick in the wall of a business that reflects who you are.
Let the adventure begin…